When working with Terraform, HashiCorp recommends keeping your workspaces small and focused on the resources that make up a single component of a larger infrastructure stack. Doing so has many benefits, but this best practice can introduce dependencies between workspaces, which in turn introduces a new challenge: how do you ensure that these interdependent component workspaces are automatically created (or destroyed) in the right order?
I wrote this blog post to present a pattern to reduce operational overhead from managing multi-workspace deployments. When combined with ephemeral workspaces, a feature coming soon to Terraform Cloud, this pattern can also help reduce costs by allowing you to destroy an entire stack of workspaces in a logical order. I’m a HashiCorp Solutions Engineer who uses this pattern frequently, and it’s used by Terraform creator and HashiCorp Co-Founder Mitchell Hashimoto, and many others.
Notes: This method is not an official HashiCorp-recommended best practice and is not intended to be the solution to all use cases. Rather, it’s just one example to explore and build upon. This blog post also includes a simpler solution to the challenge above, which should work for a large number of use cases. While this blog post was written with Terraform Cloud in mind, the same concepts and configuration will also work in Terraform Enterprise as well, depending on your version. Finally, the suggestions presented here all assume a basic understanding of Terraform Cloud, and you can try out the code examples yourself in this GitHub repository.
Workspaces, run triggers, and the Terraform Cloud/Enterprise provider
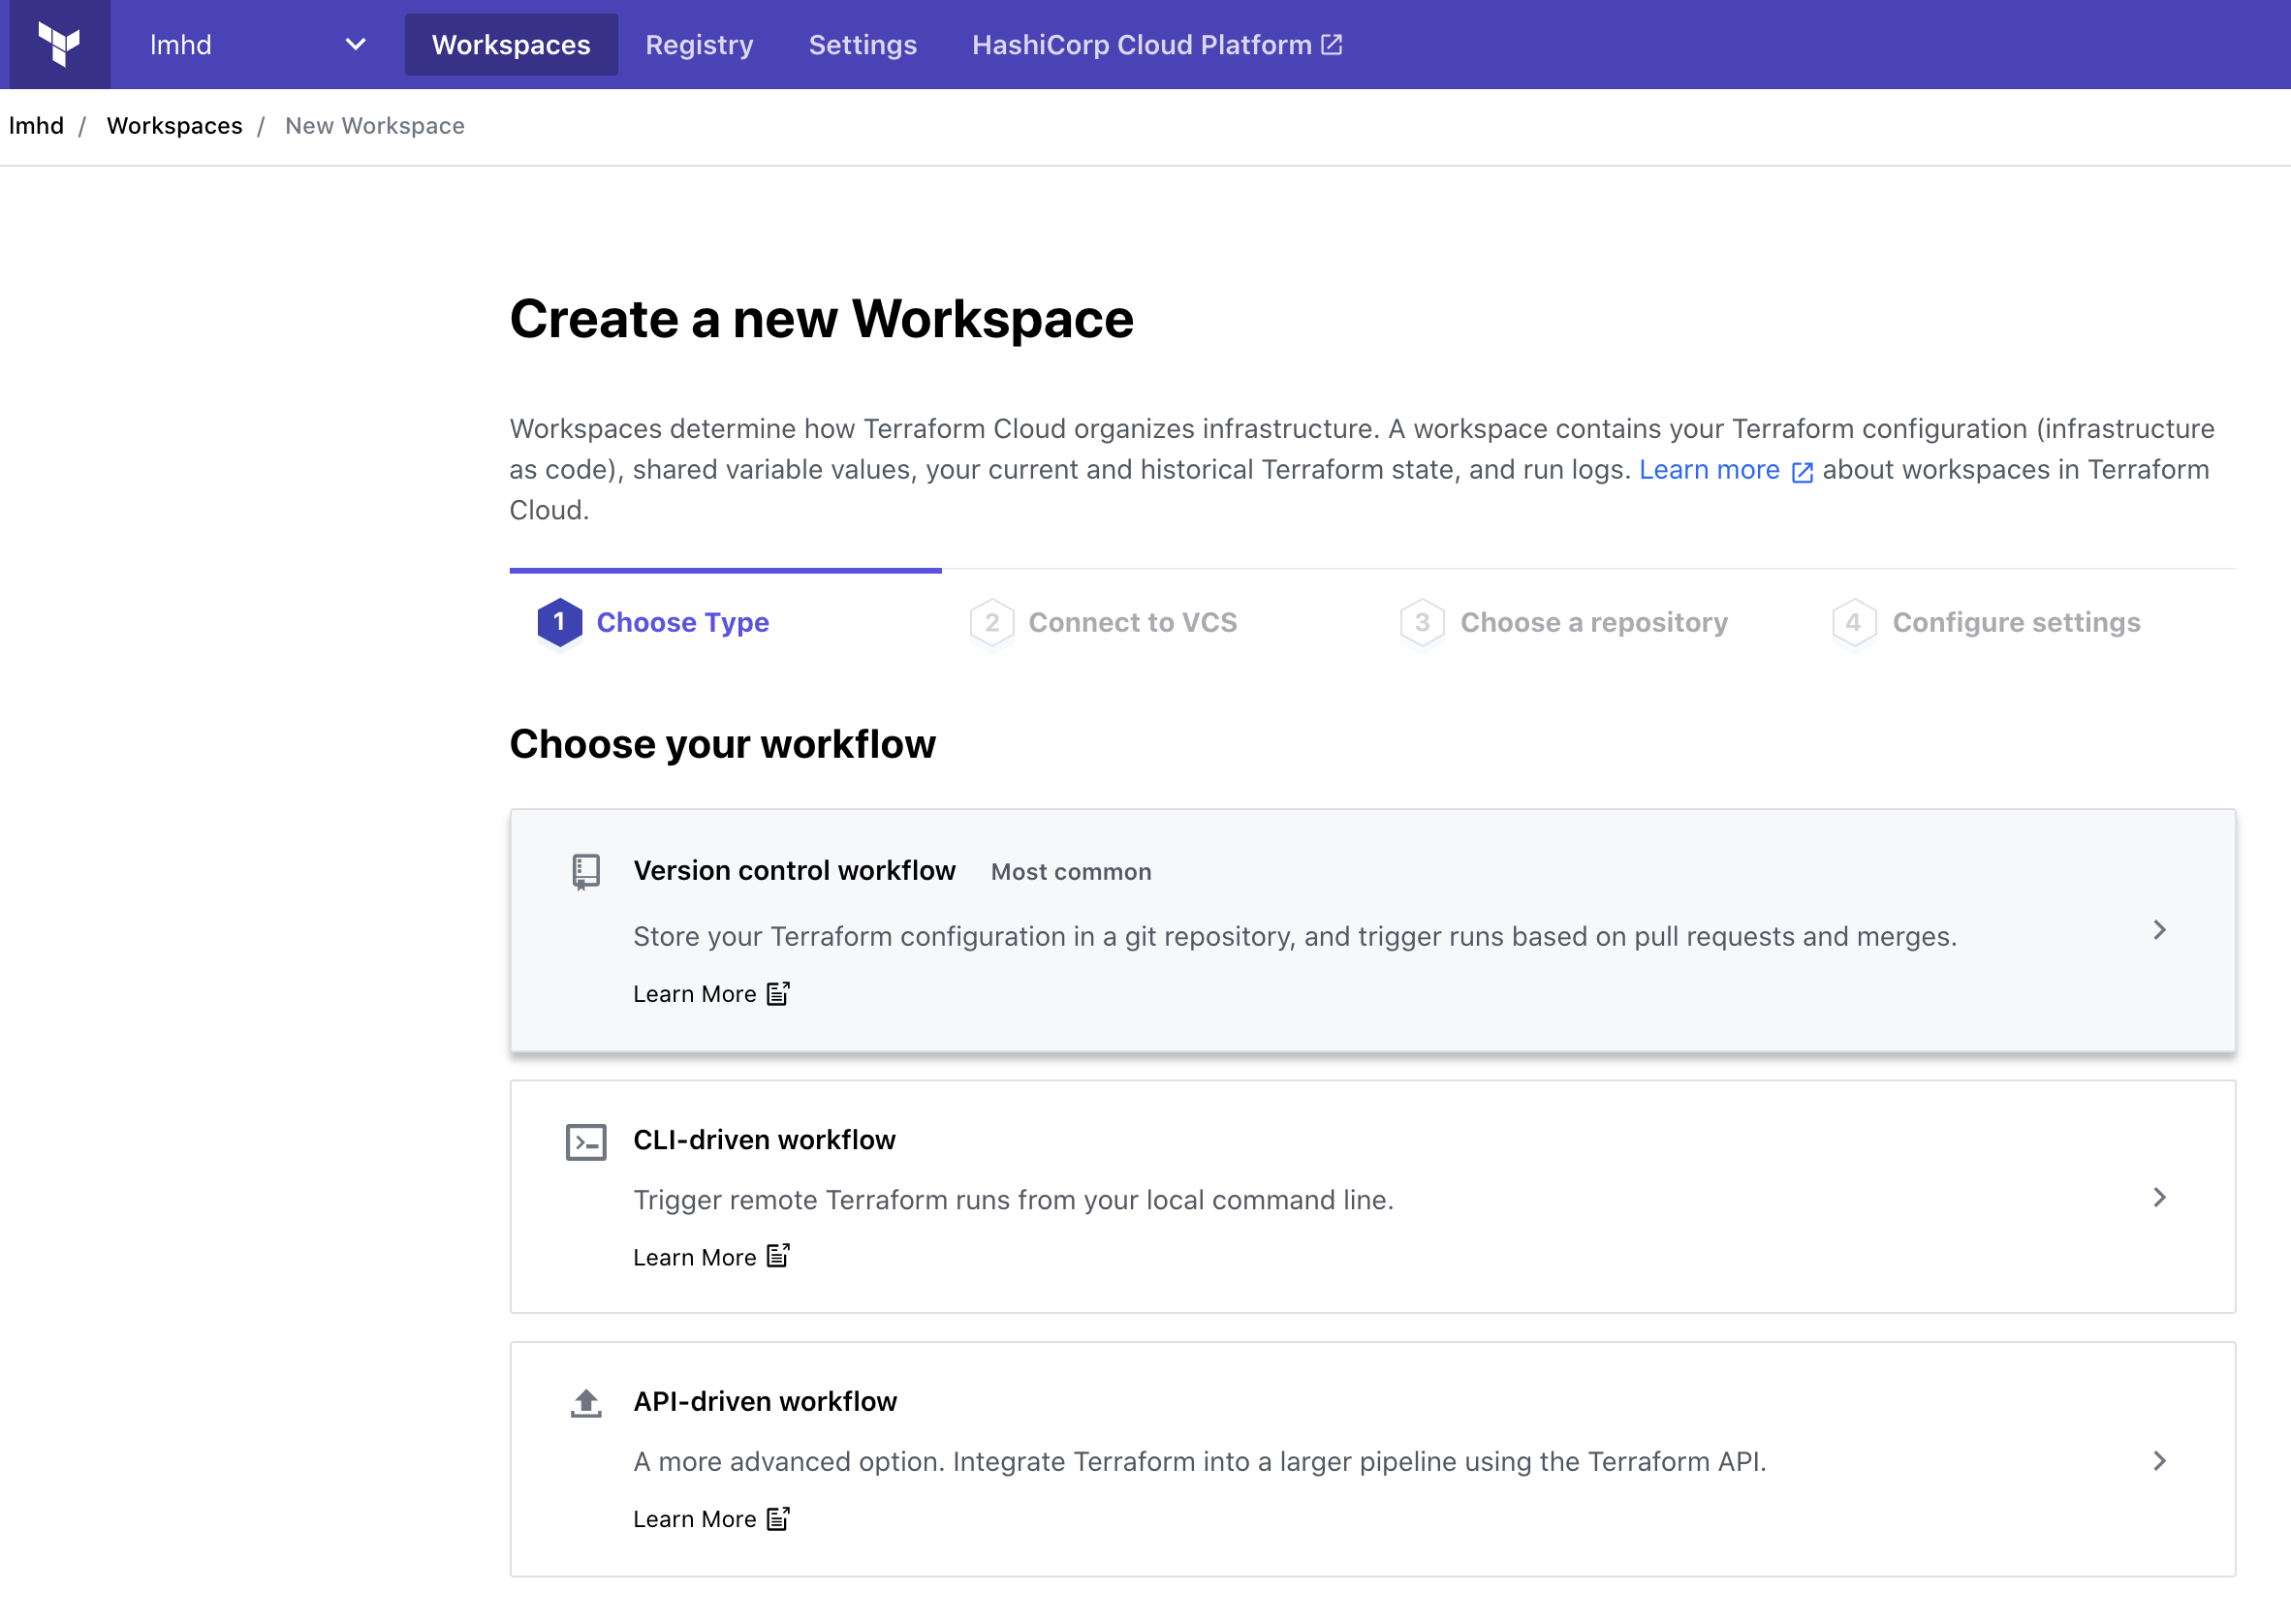
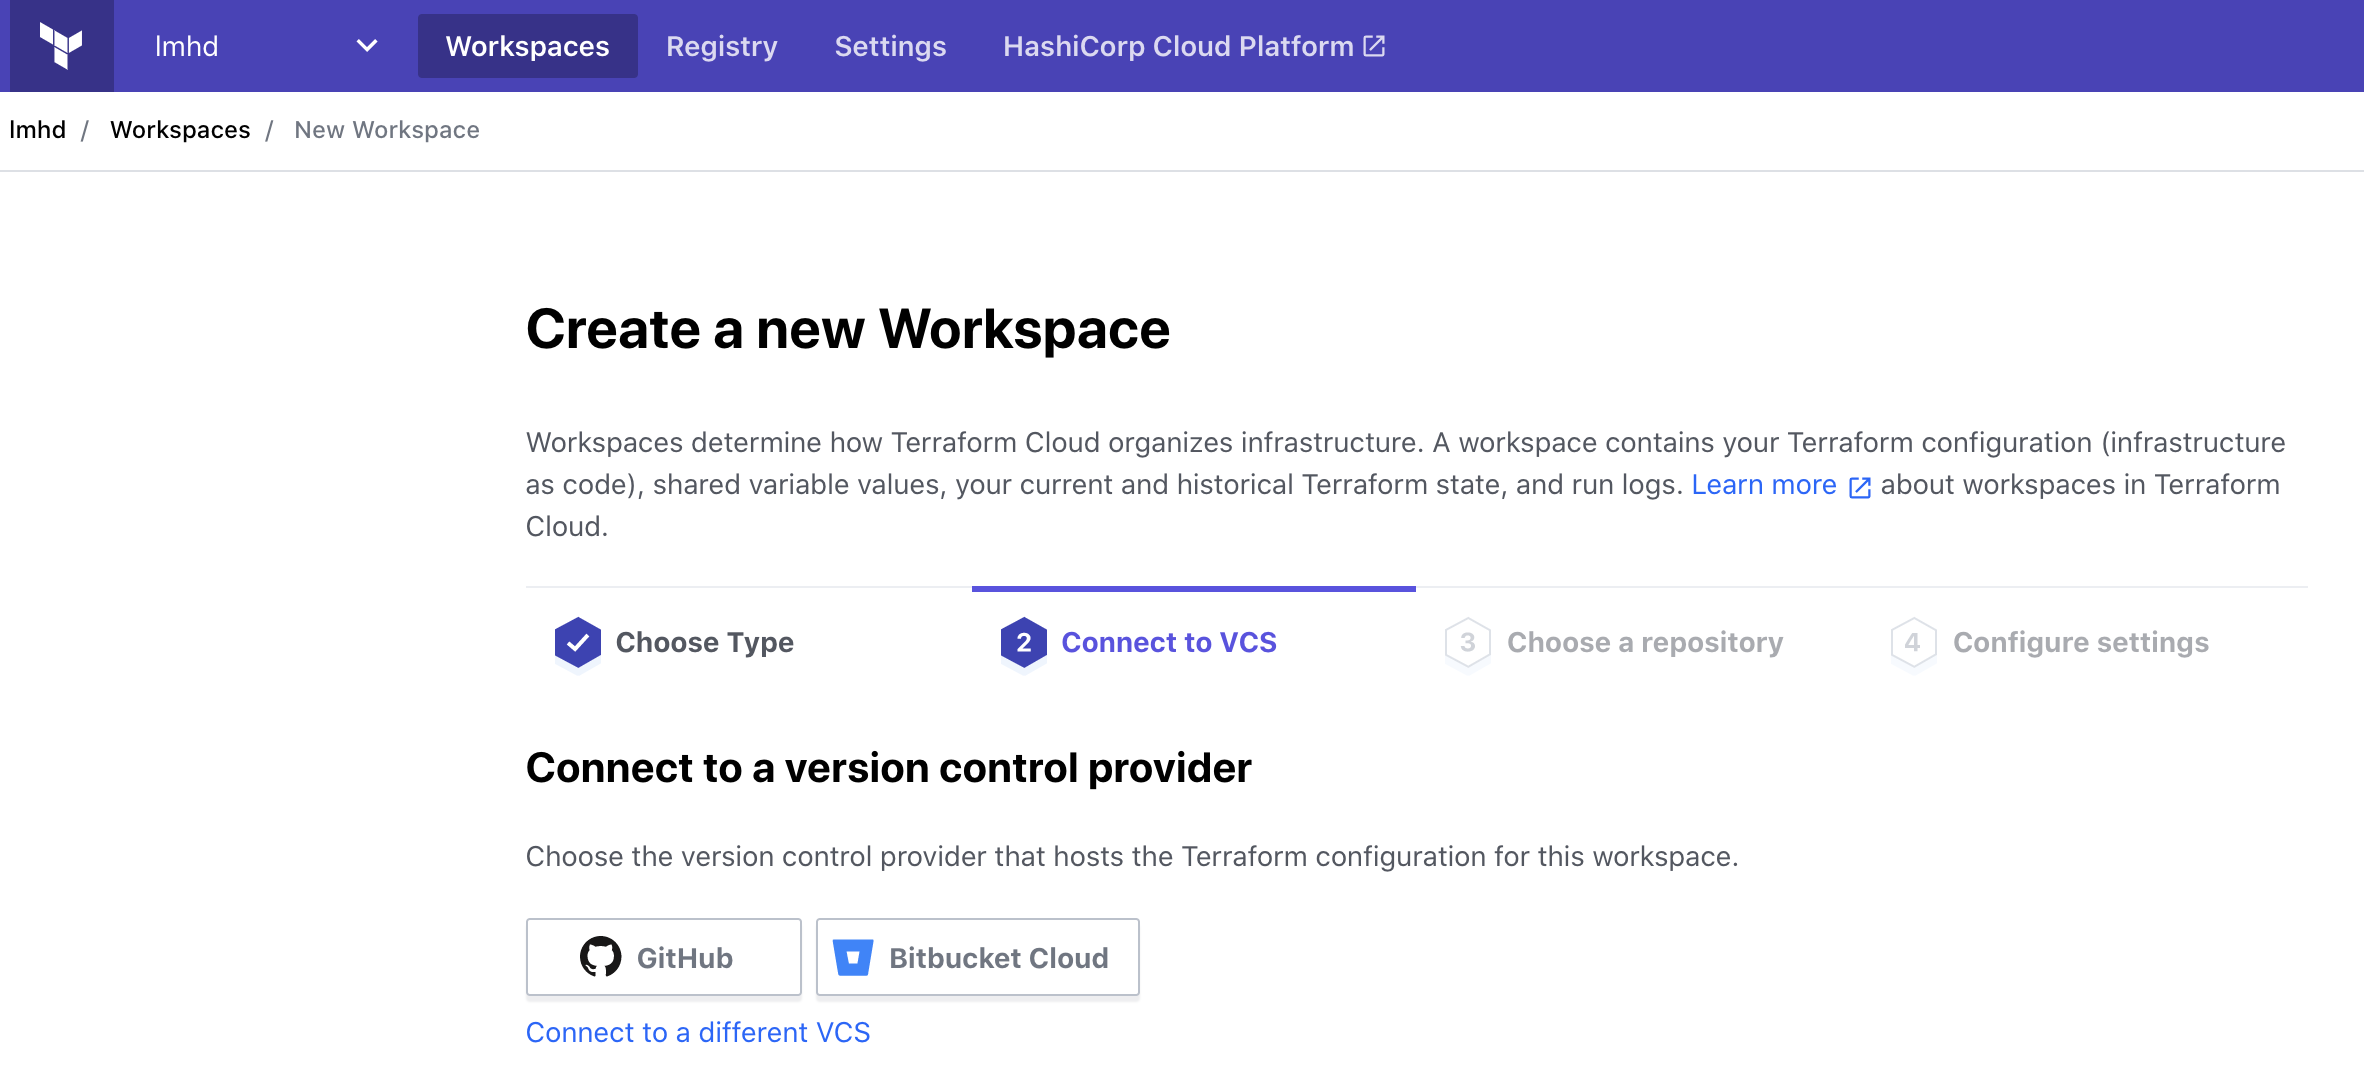
A workspace in Terraform Cloud contains everything Terraform needs to manage a given collection of infrastructure, including variables, state, configuration, and credentials. For example, you may have one workspace that defines your virtual network and another for compute. These workspaces depend on each other; you cannot create your compute until you have a virtual network. The outputs from one workspace become the inputs to another.
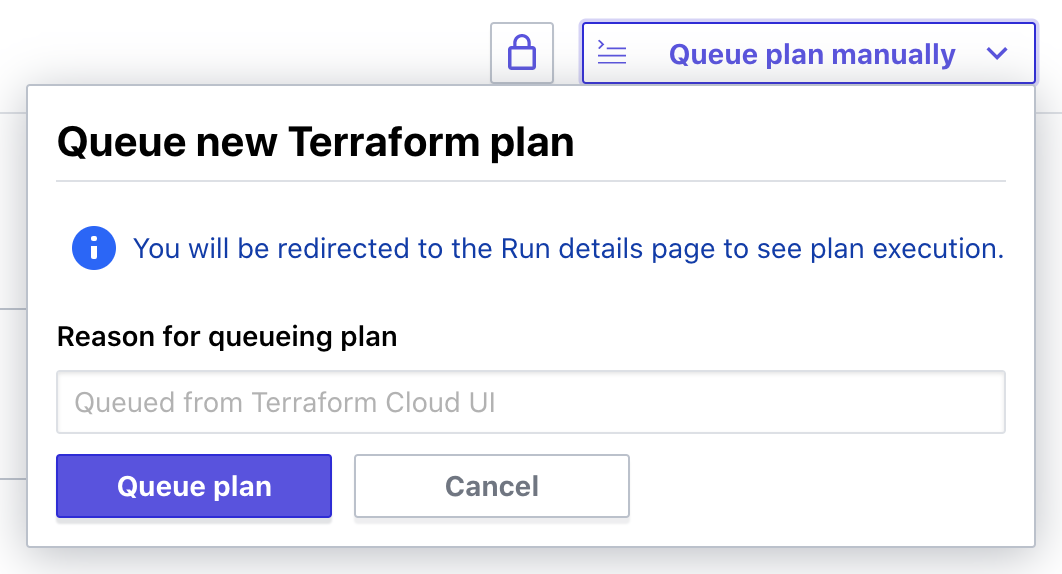
Terraform Cloud has a feature called run triggers. This allows you to kick off an apply on your compute workspace after your virtual network has been created. You can also define a one-to-many relationship here, where the successful apply on one upstream workspace triggers multiple downstream workspaces.
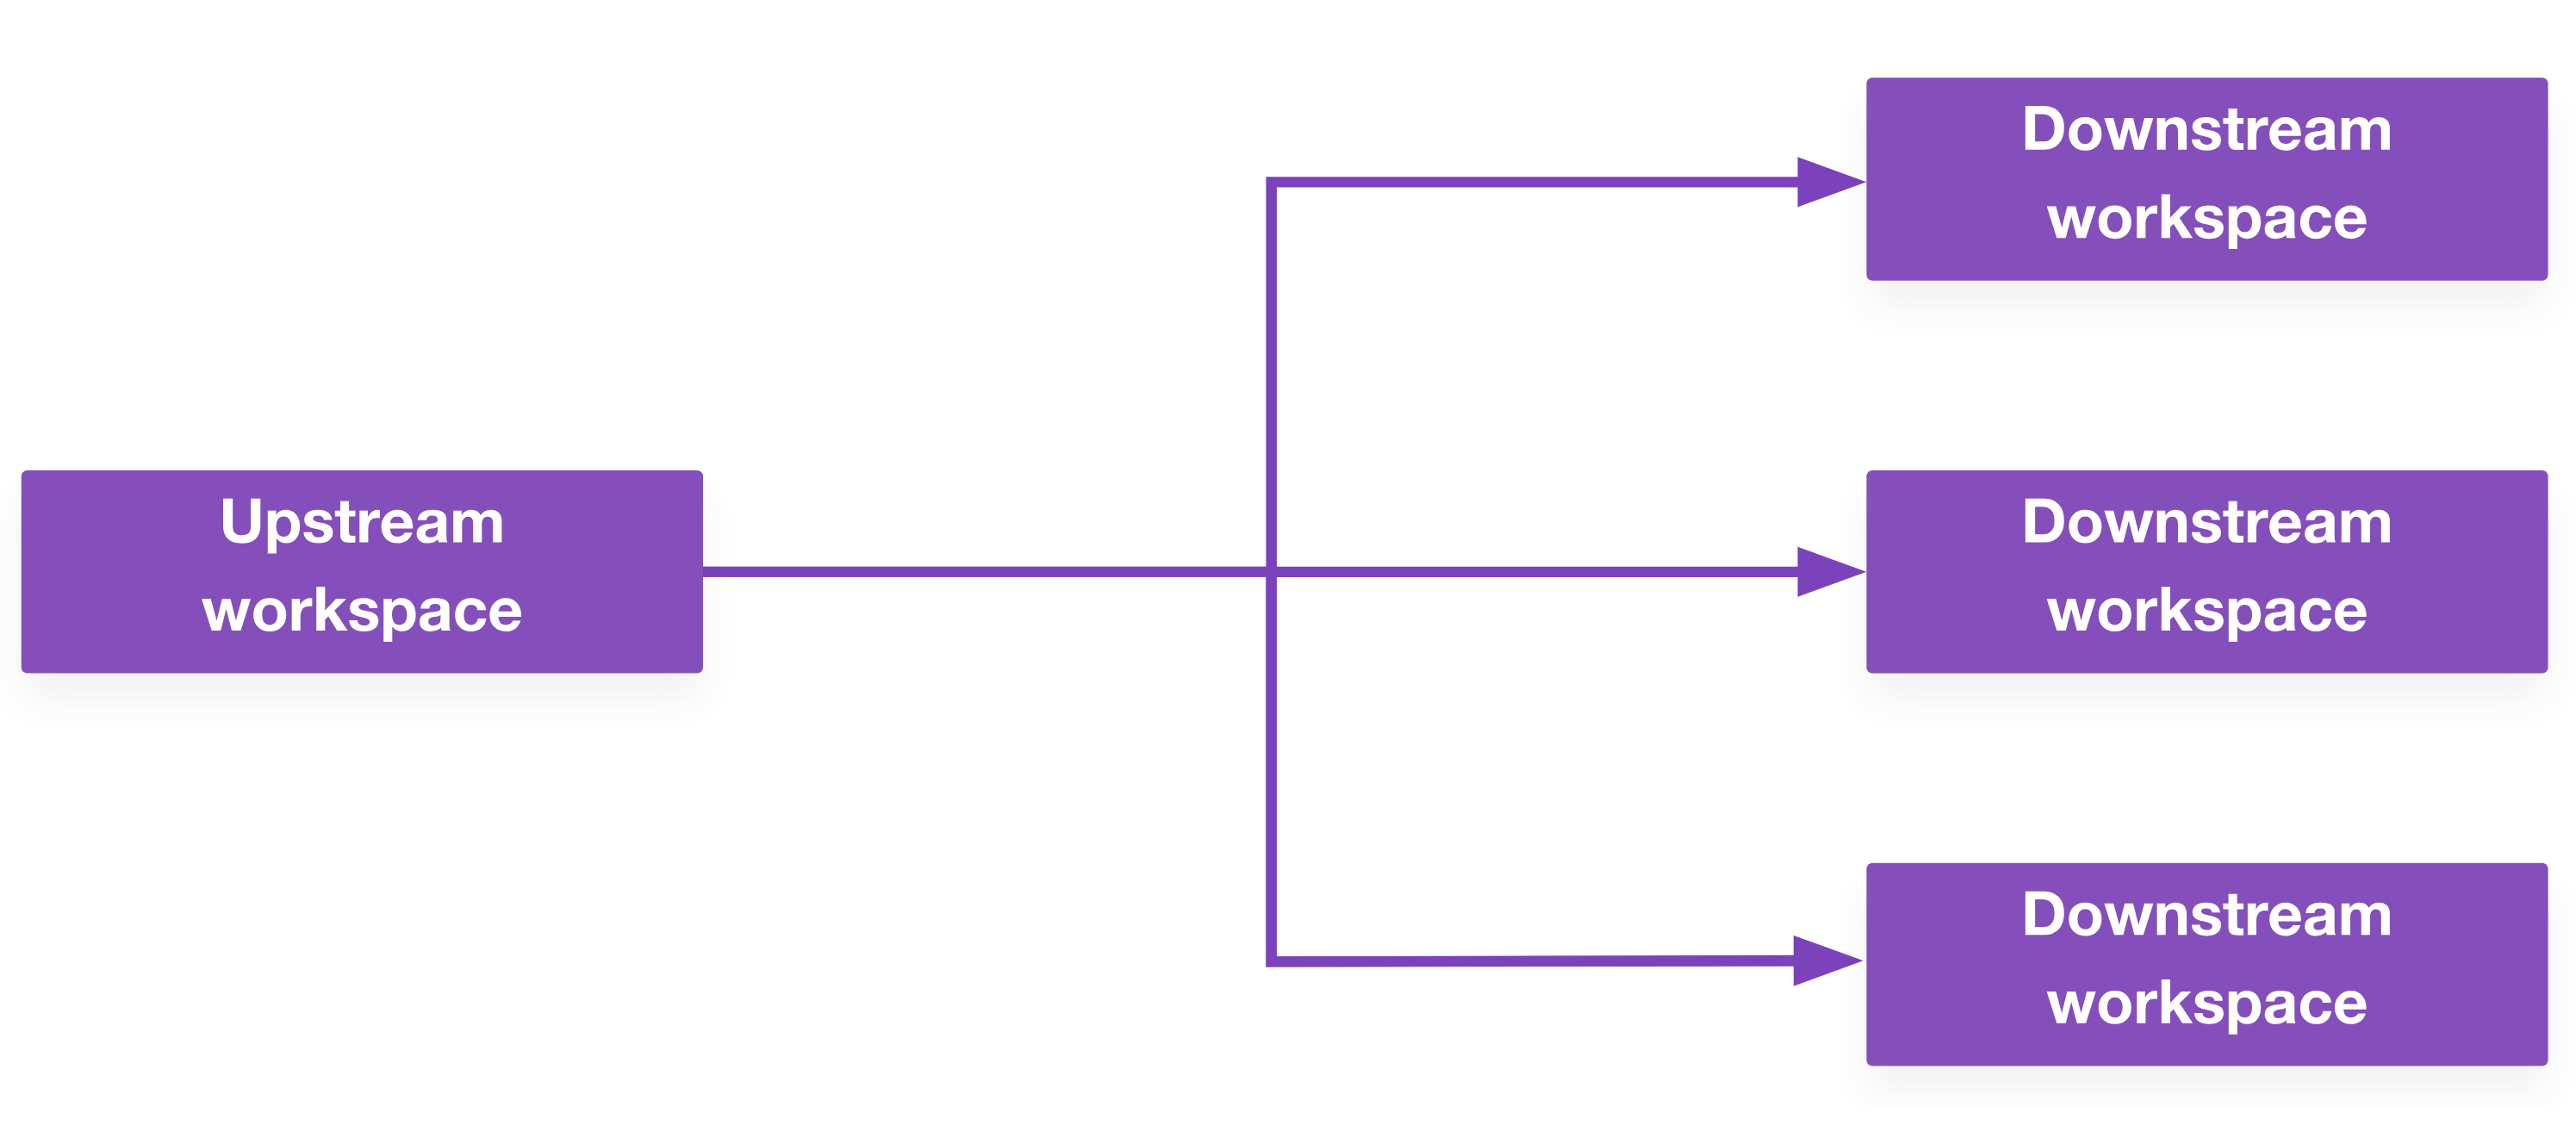
This alone solves some dependency challenges and is great for simple workflows. If it works for your use case, you should use it.
However, it doesn’t address all situations, which is why Mitchell Hashimoto created the multispace provider to handle the kind of cascading creation/destruction workflows that can’t be done with simple run triggers. His example use case involves creating a Kubernetes stack: first you create the underlying virtual machines, then the core kubernetes services, DNS, and ingress. Each of these is its own separate workspace.
This initial implementation has since been refined and incorporated into the official Terraform Cloud/Enterprise provider (also called the “TFE provider”) in the form of the tfe_workspace_run resource.
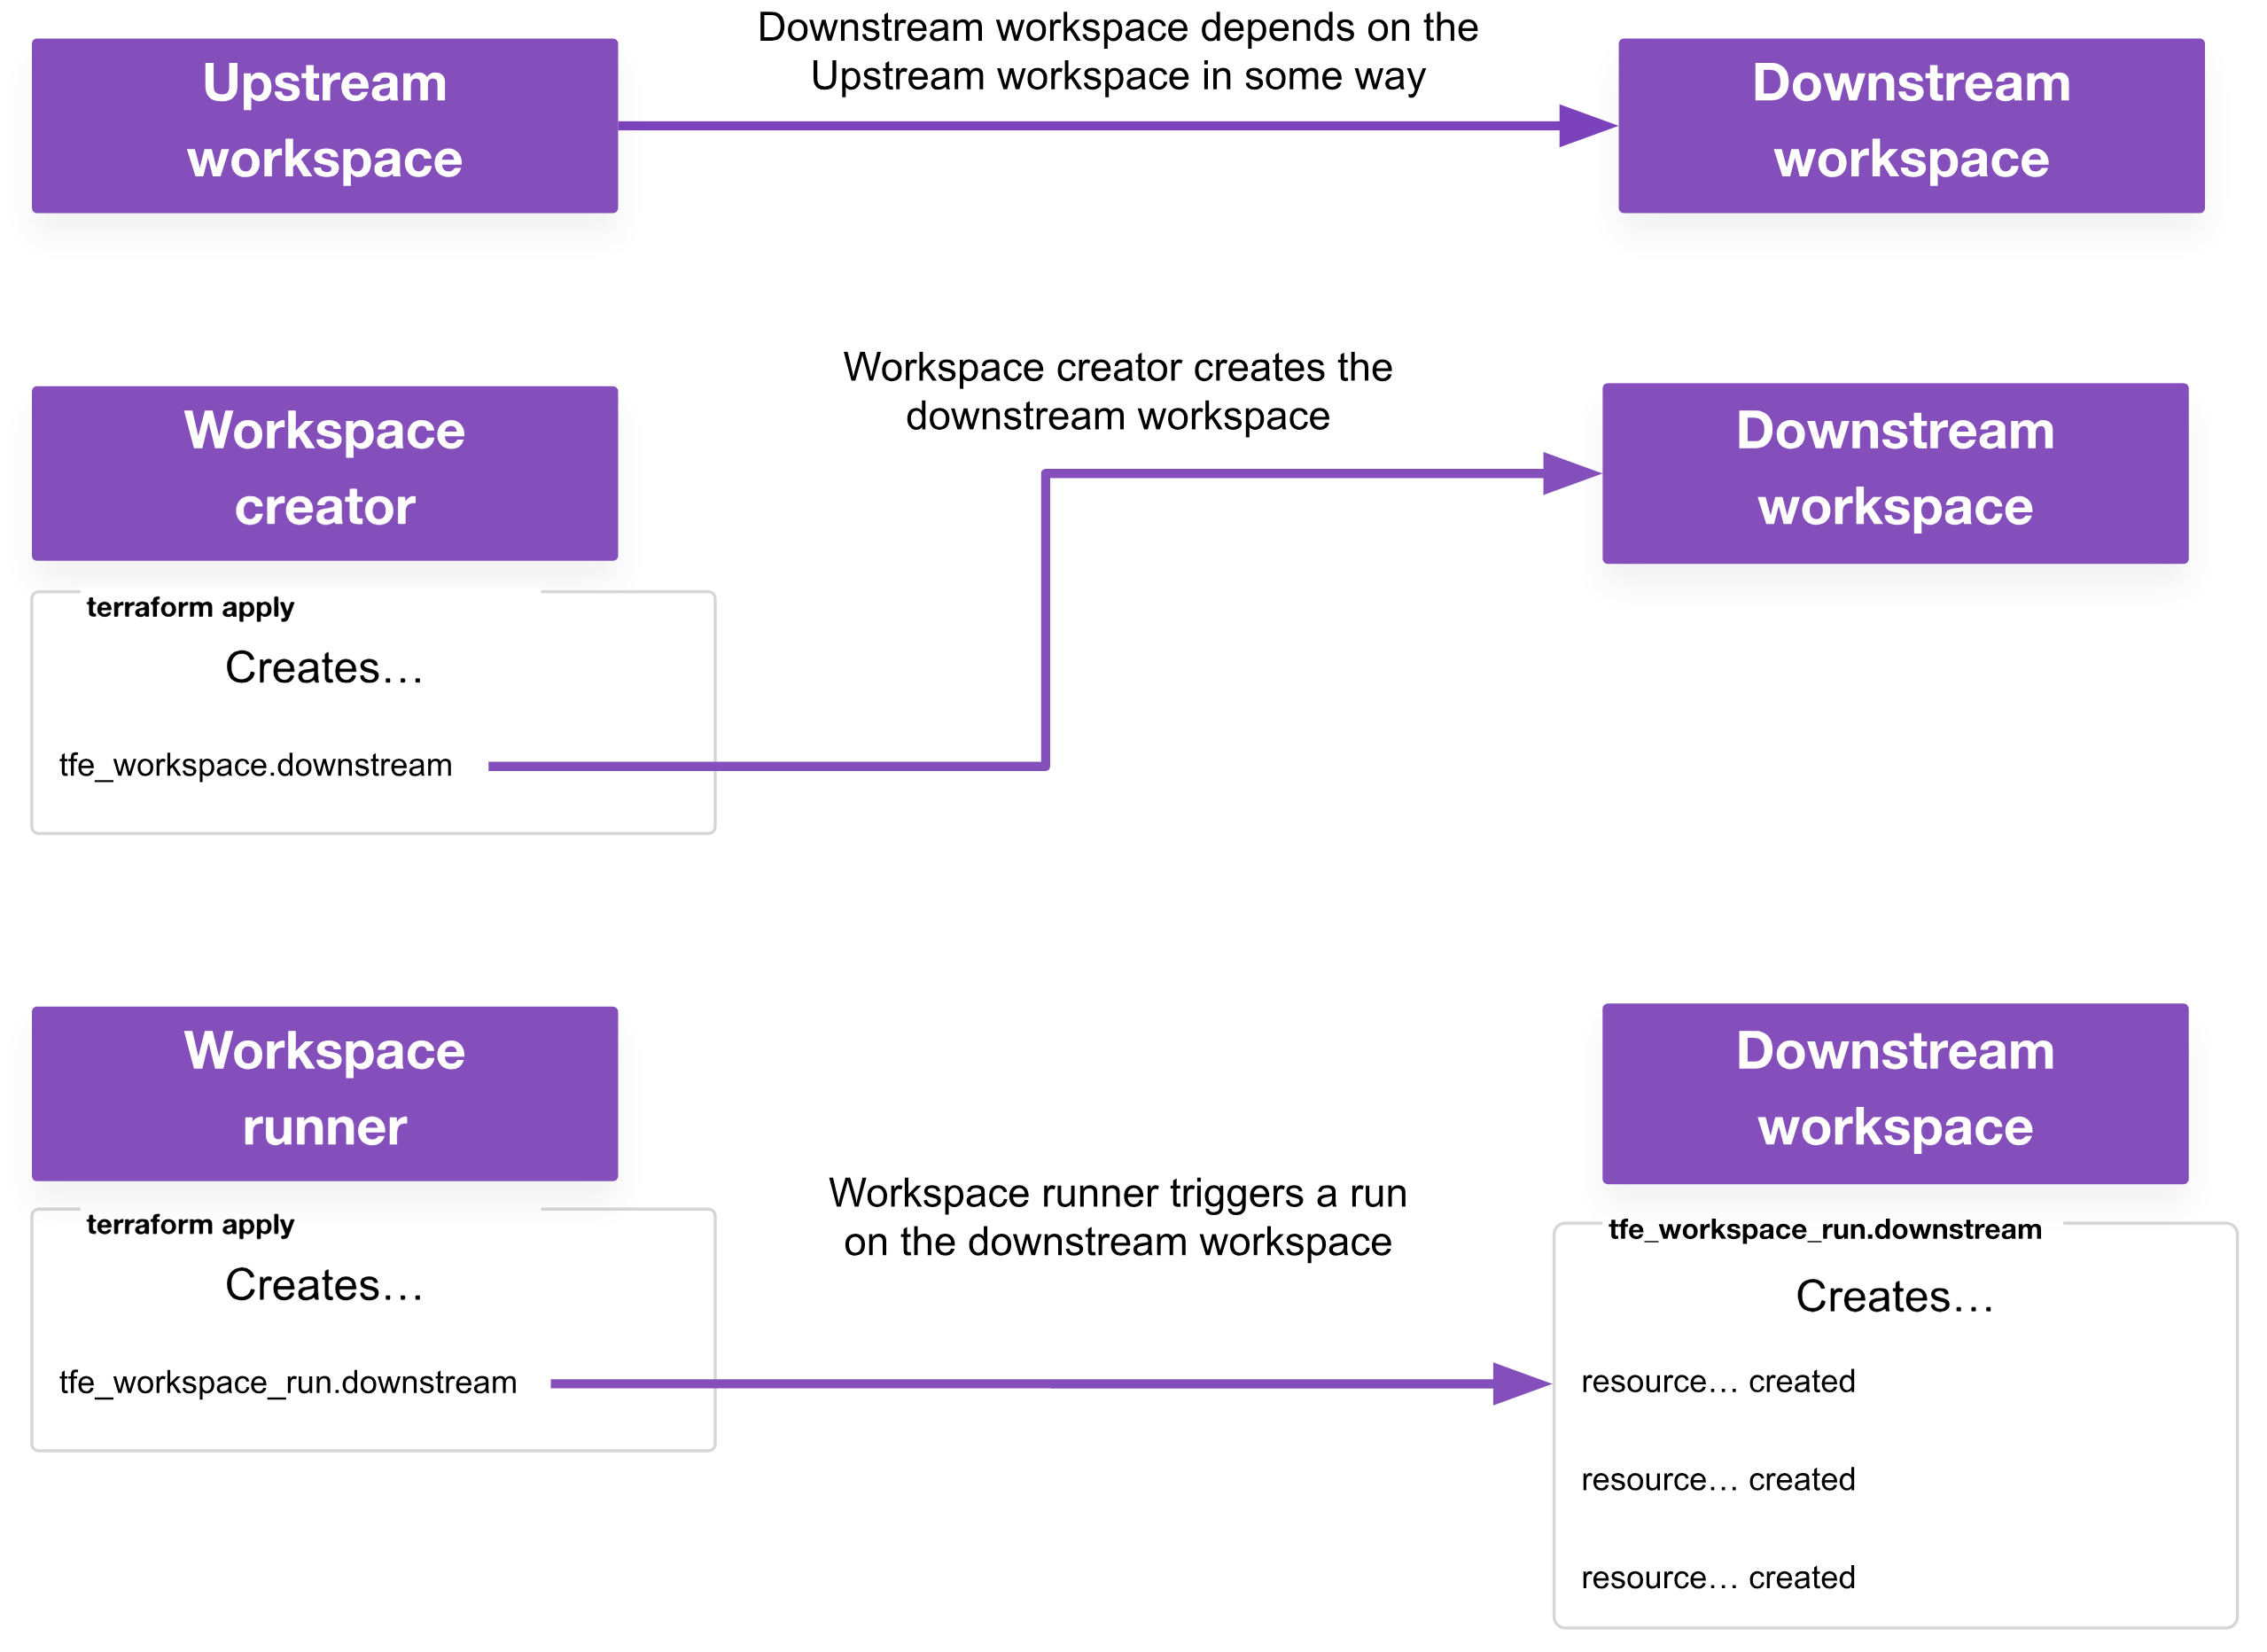
For clarity, this post uses the following terminology when referring to the roles a workspace could have in multi-workspace deployments (an individual workspace may have one or more of these roles):
- Upstream workspace: This is a workspace that must run first, and is depended upon in some way by a downstream workspace
- Downstream workspace: This is a workspace that runs second, because it has some dependency on the upstream workspace
- Workspace runner: This is a workspace responsible for triggering runs on other workspaces with the
tfe_workspace_runresource. - Workspace creator: This is a workspace responsible for creating other workspaces with the
tfe_workspaceresource. This is usually also a workspace runner in my use cases, but it may not be a requirement for yours.
Applies
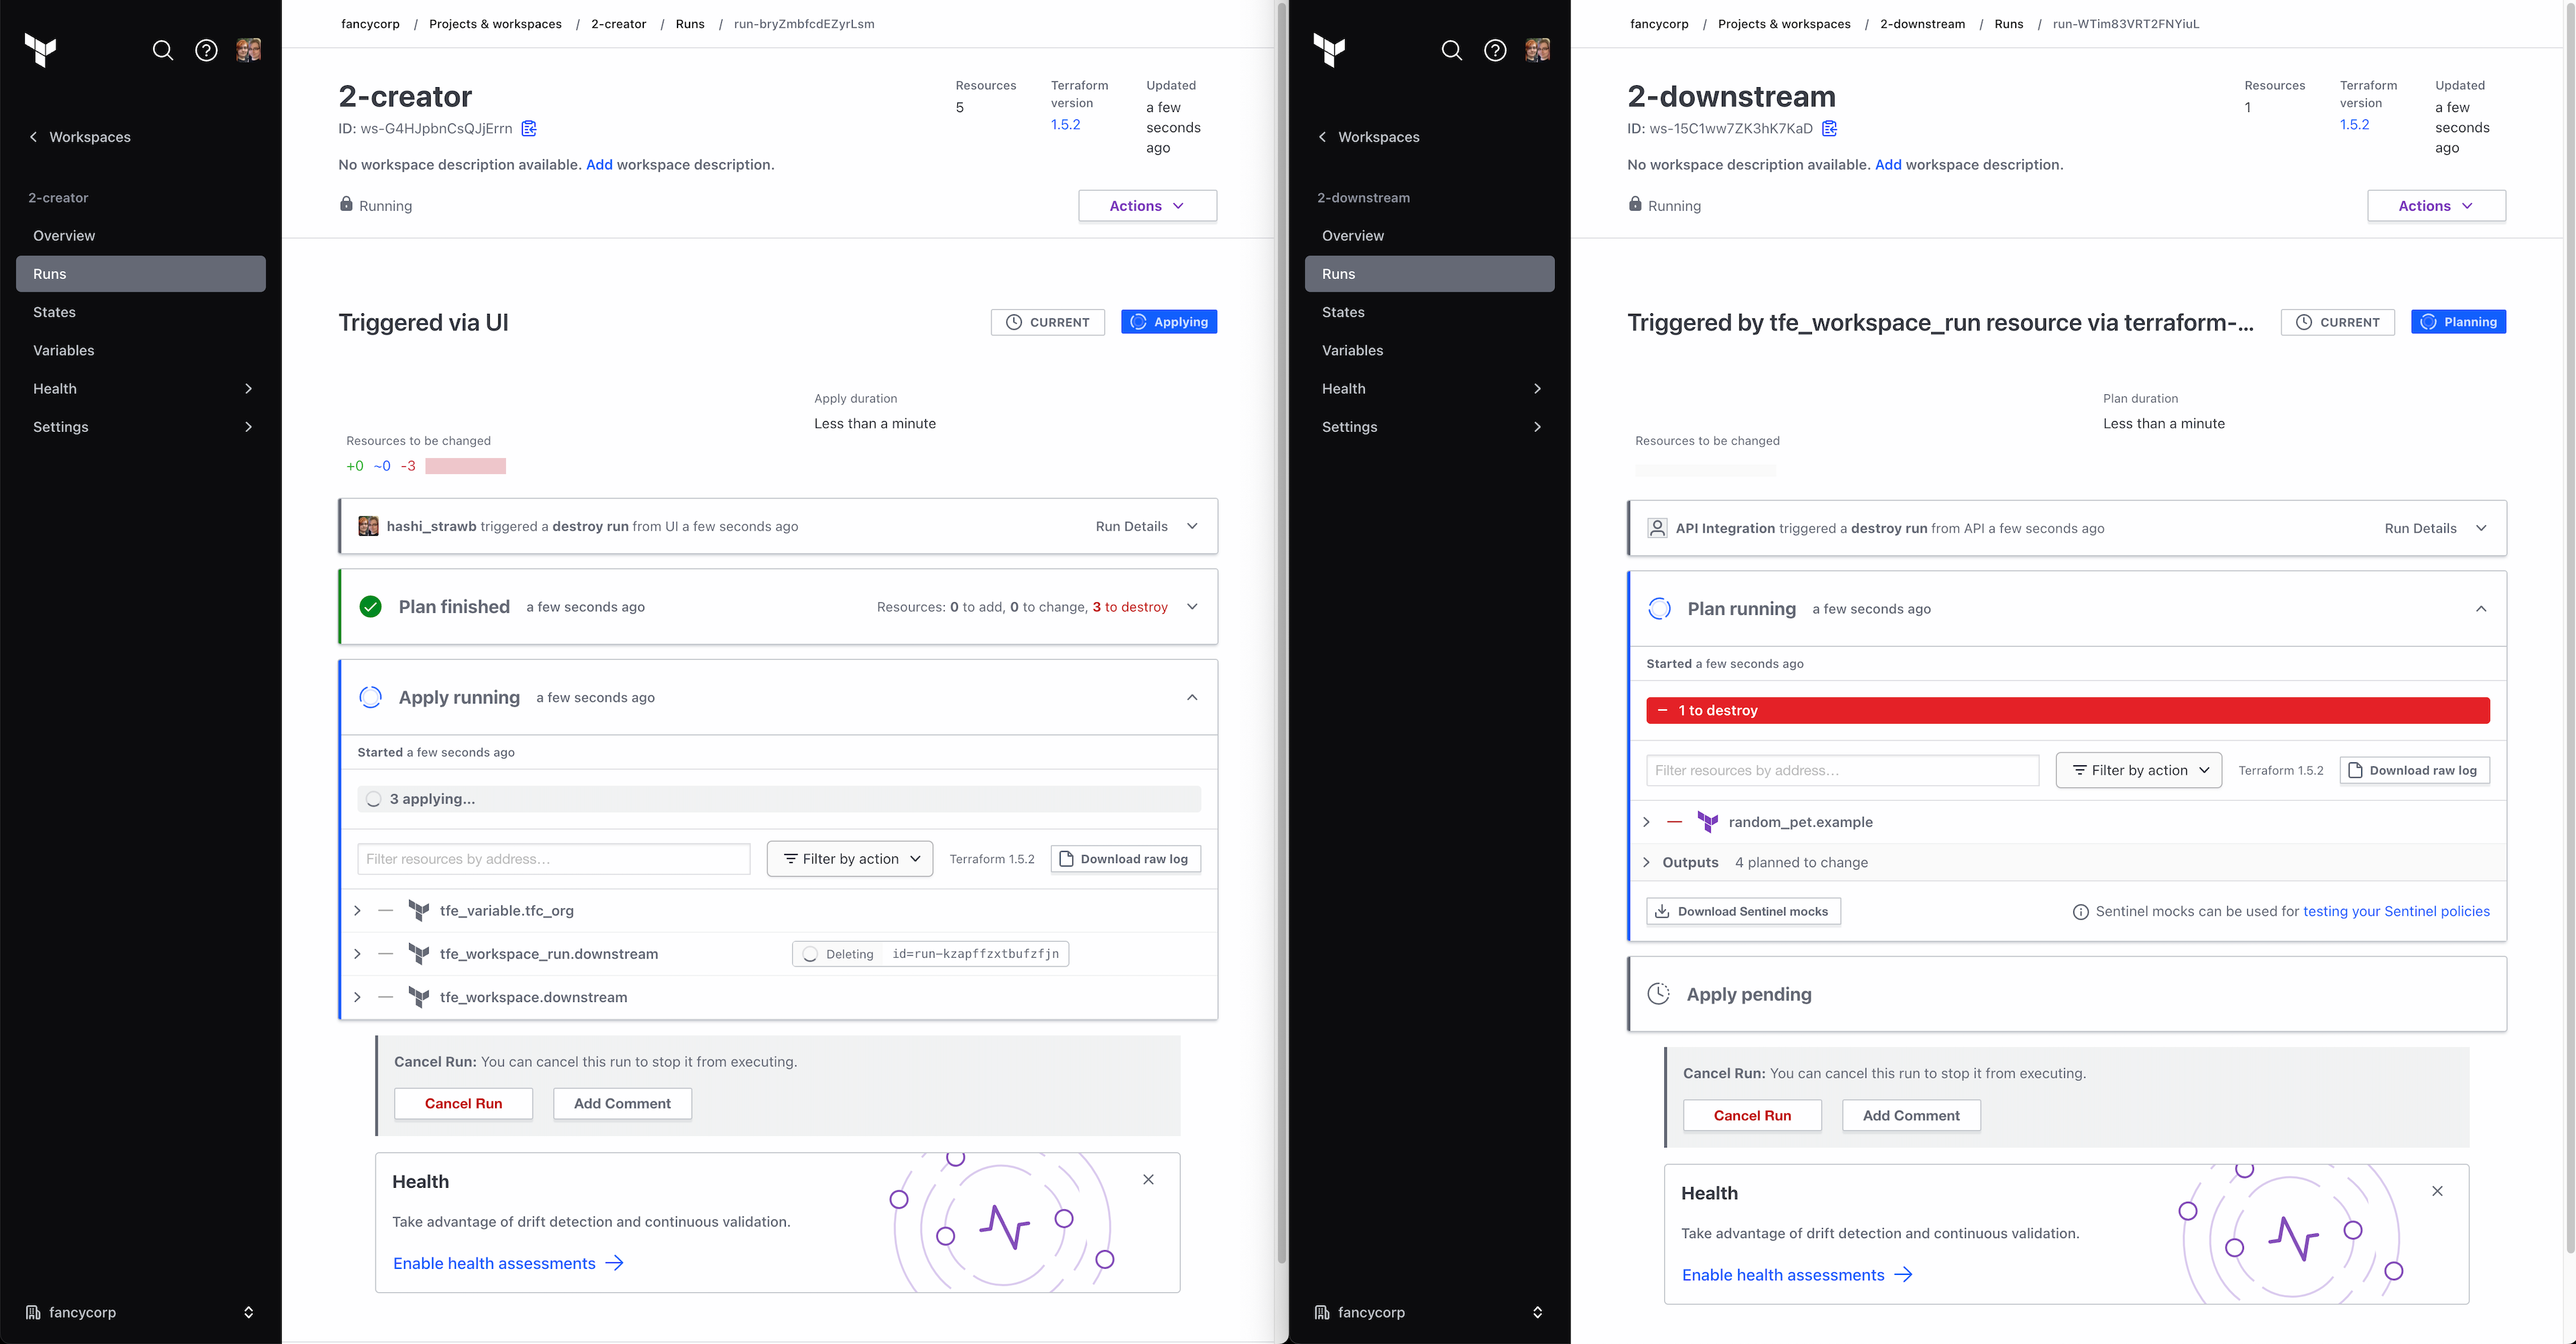
Here’s an example of how run triggers and tfe_workspace_run differ: run triggers will always kick off a plan on the downstream workspace once the upstream workspace has completed a successful apply. Sometimes this results in plans on the downstream workspace that are unnecessary (in the case of a do-nothing plan) or that fail (when a downstream workspace has a dependency on multiple upstream workspaces but some upstream workspaces haven’t yet completed their apply phases).
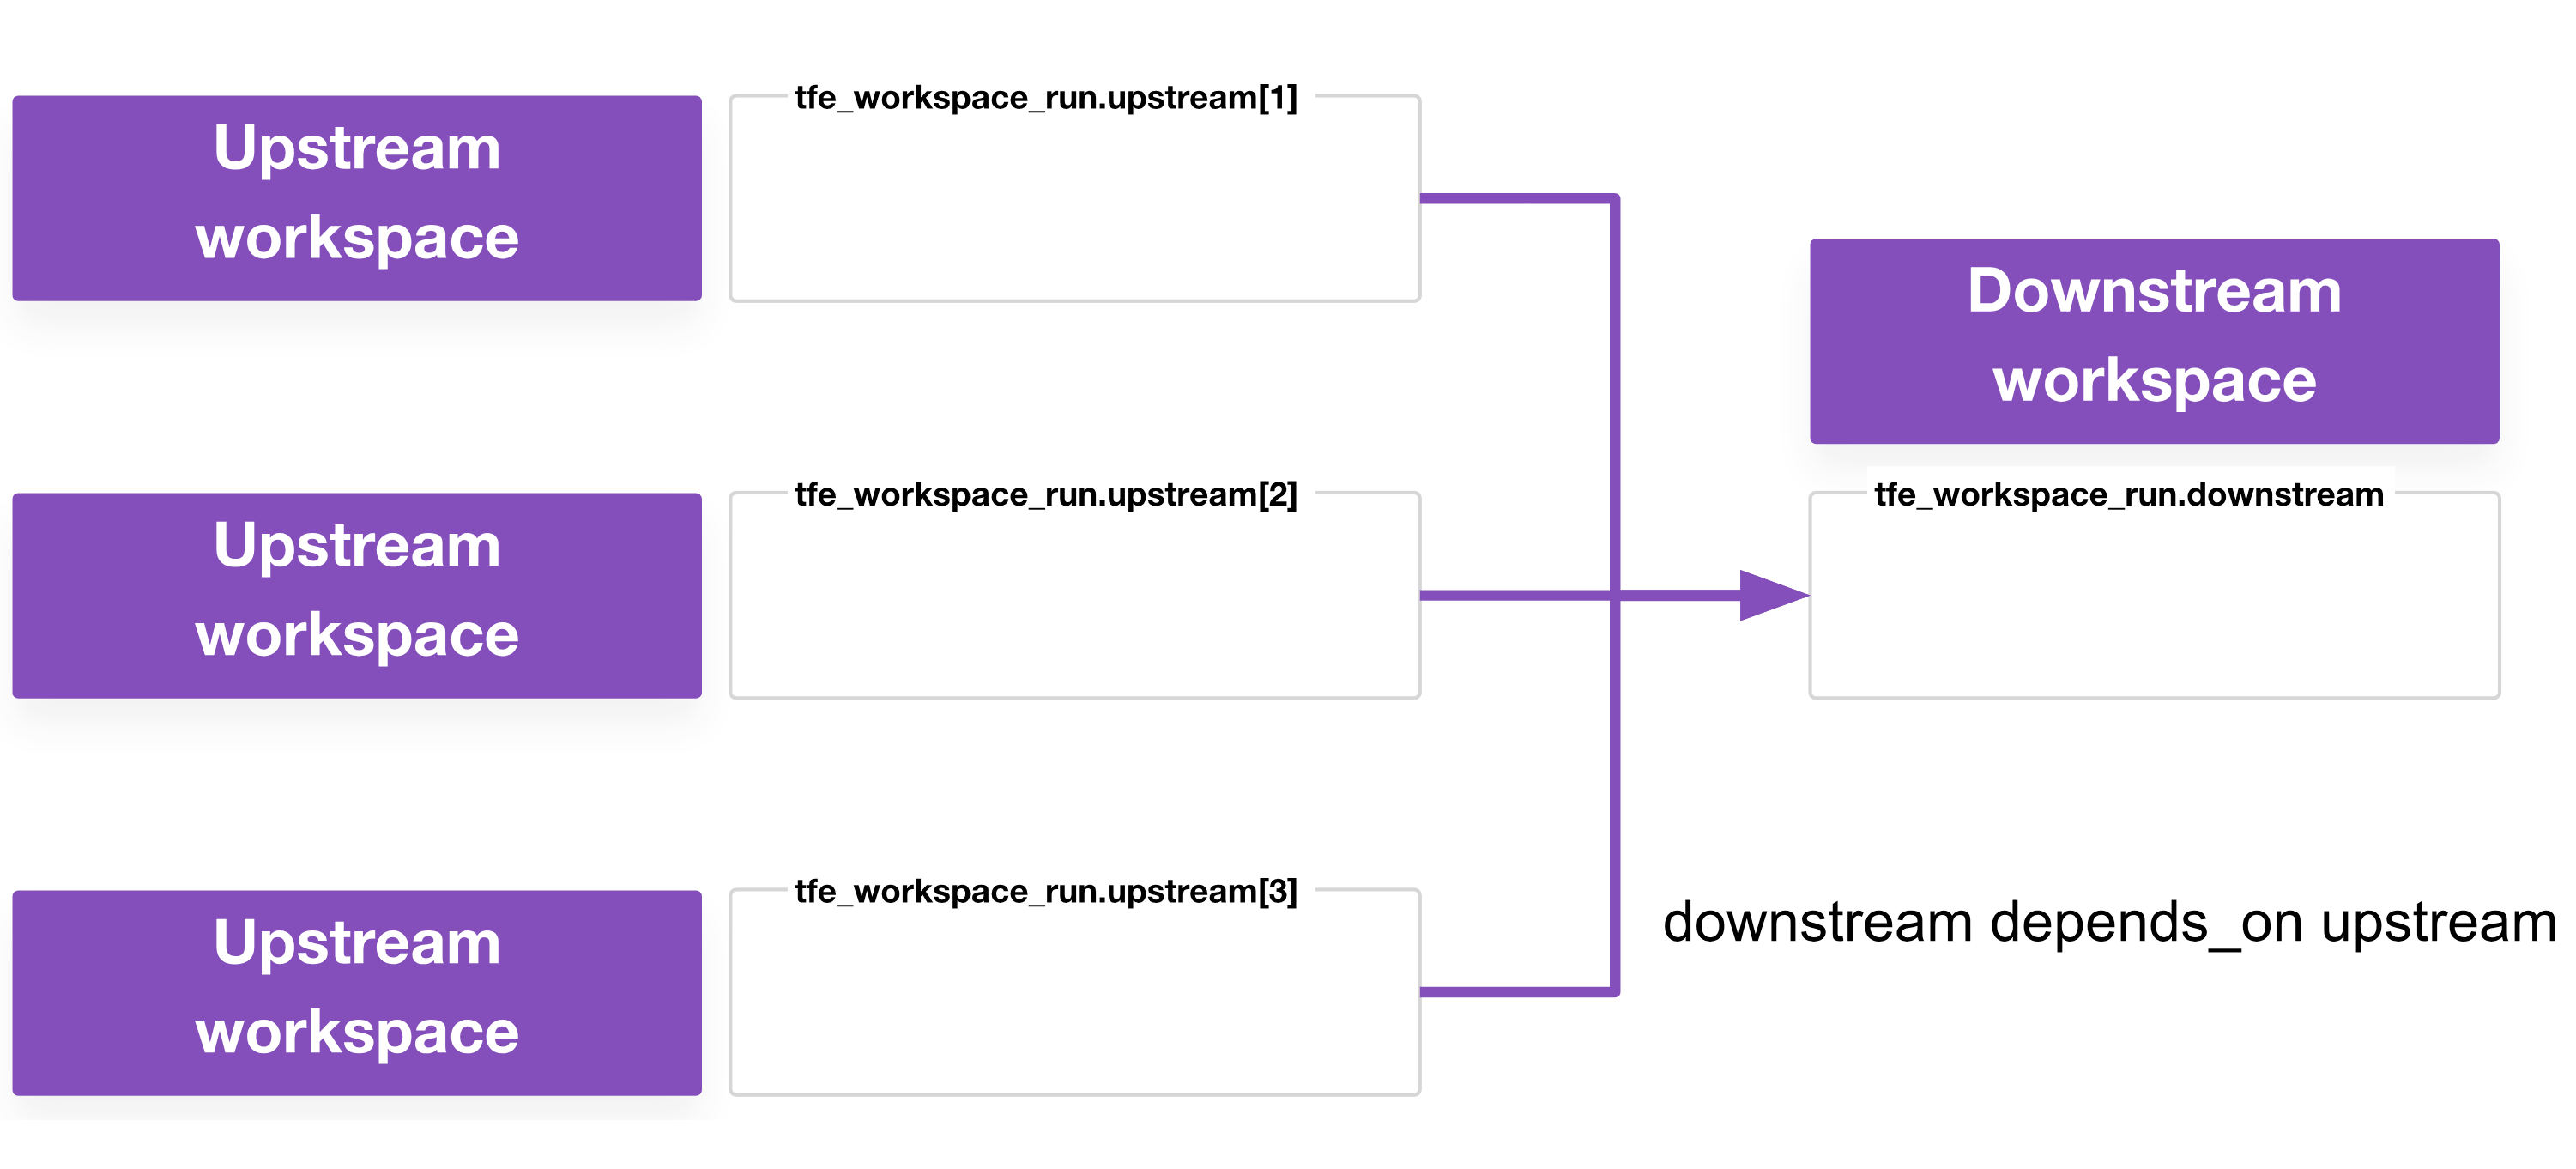
With tfe_workspace_run you can specify when to apply and under what circumstance. For example, with depends_on, a workspace runner could wait until several upstream workspaces have applied before kicking off the downstream workspace. If that is the only benefit relevant to you, chances are that run triggers are probably good enough for your use case; you’re probably fine with a do-nothing or failed plan every now and then.
You can use the tfe_workspace_run resource in two operational modes:
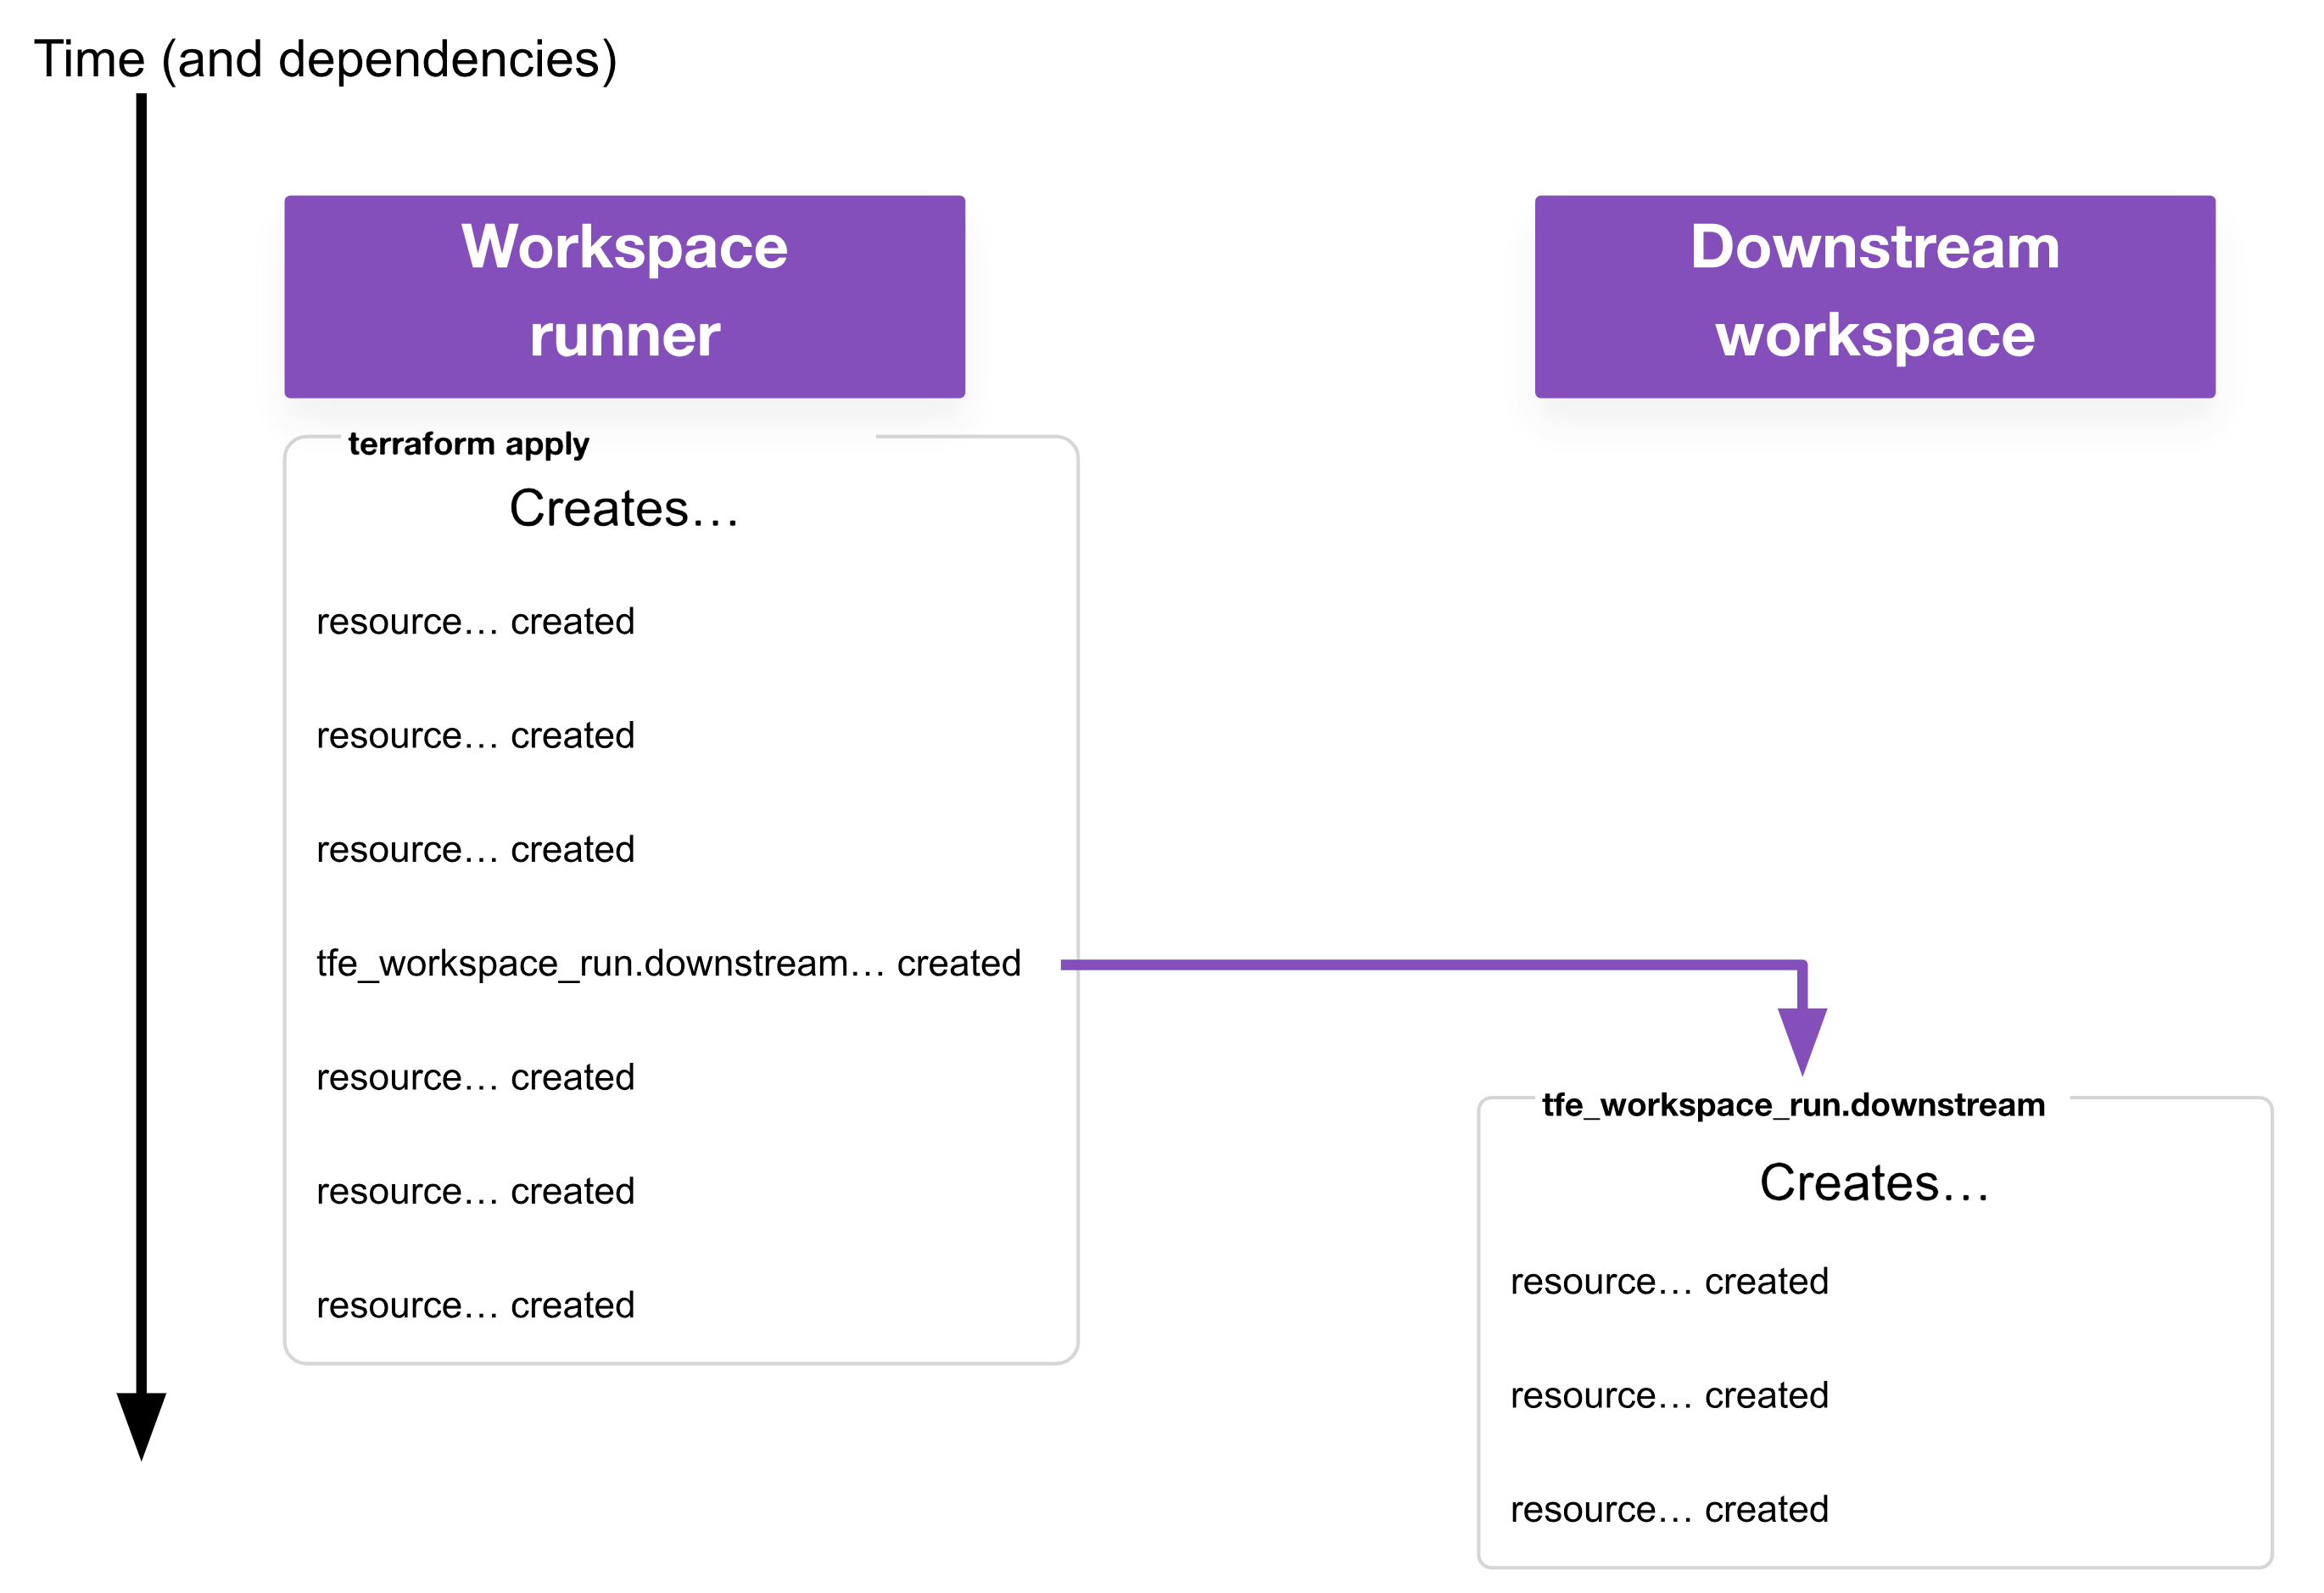
Fire-and-forget: The resource simply queues a run on the downstream workspace and considers it good enough if the run was successfully queued. This mode is very similar to how run triggers work.
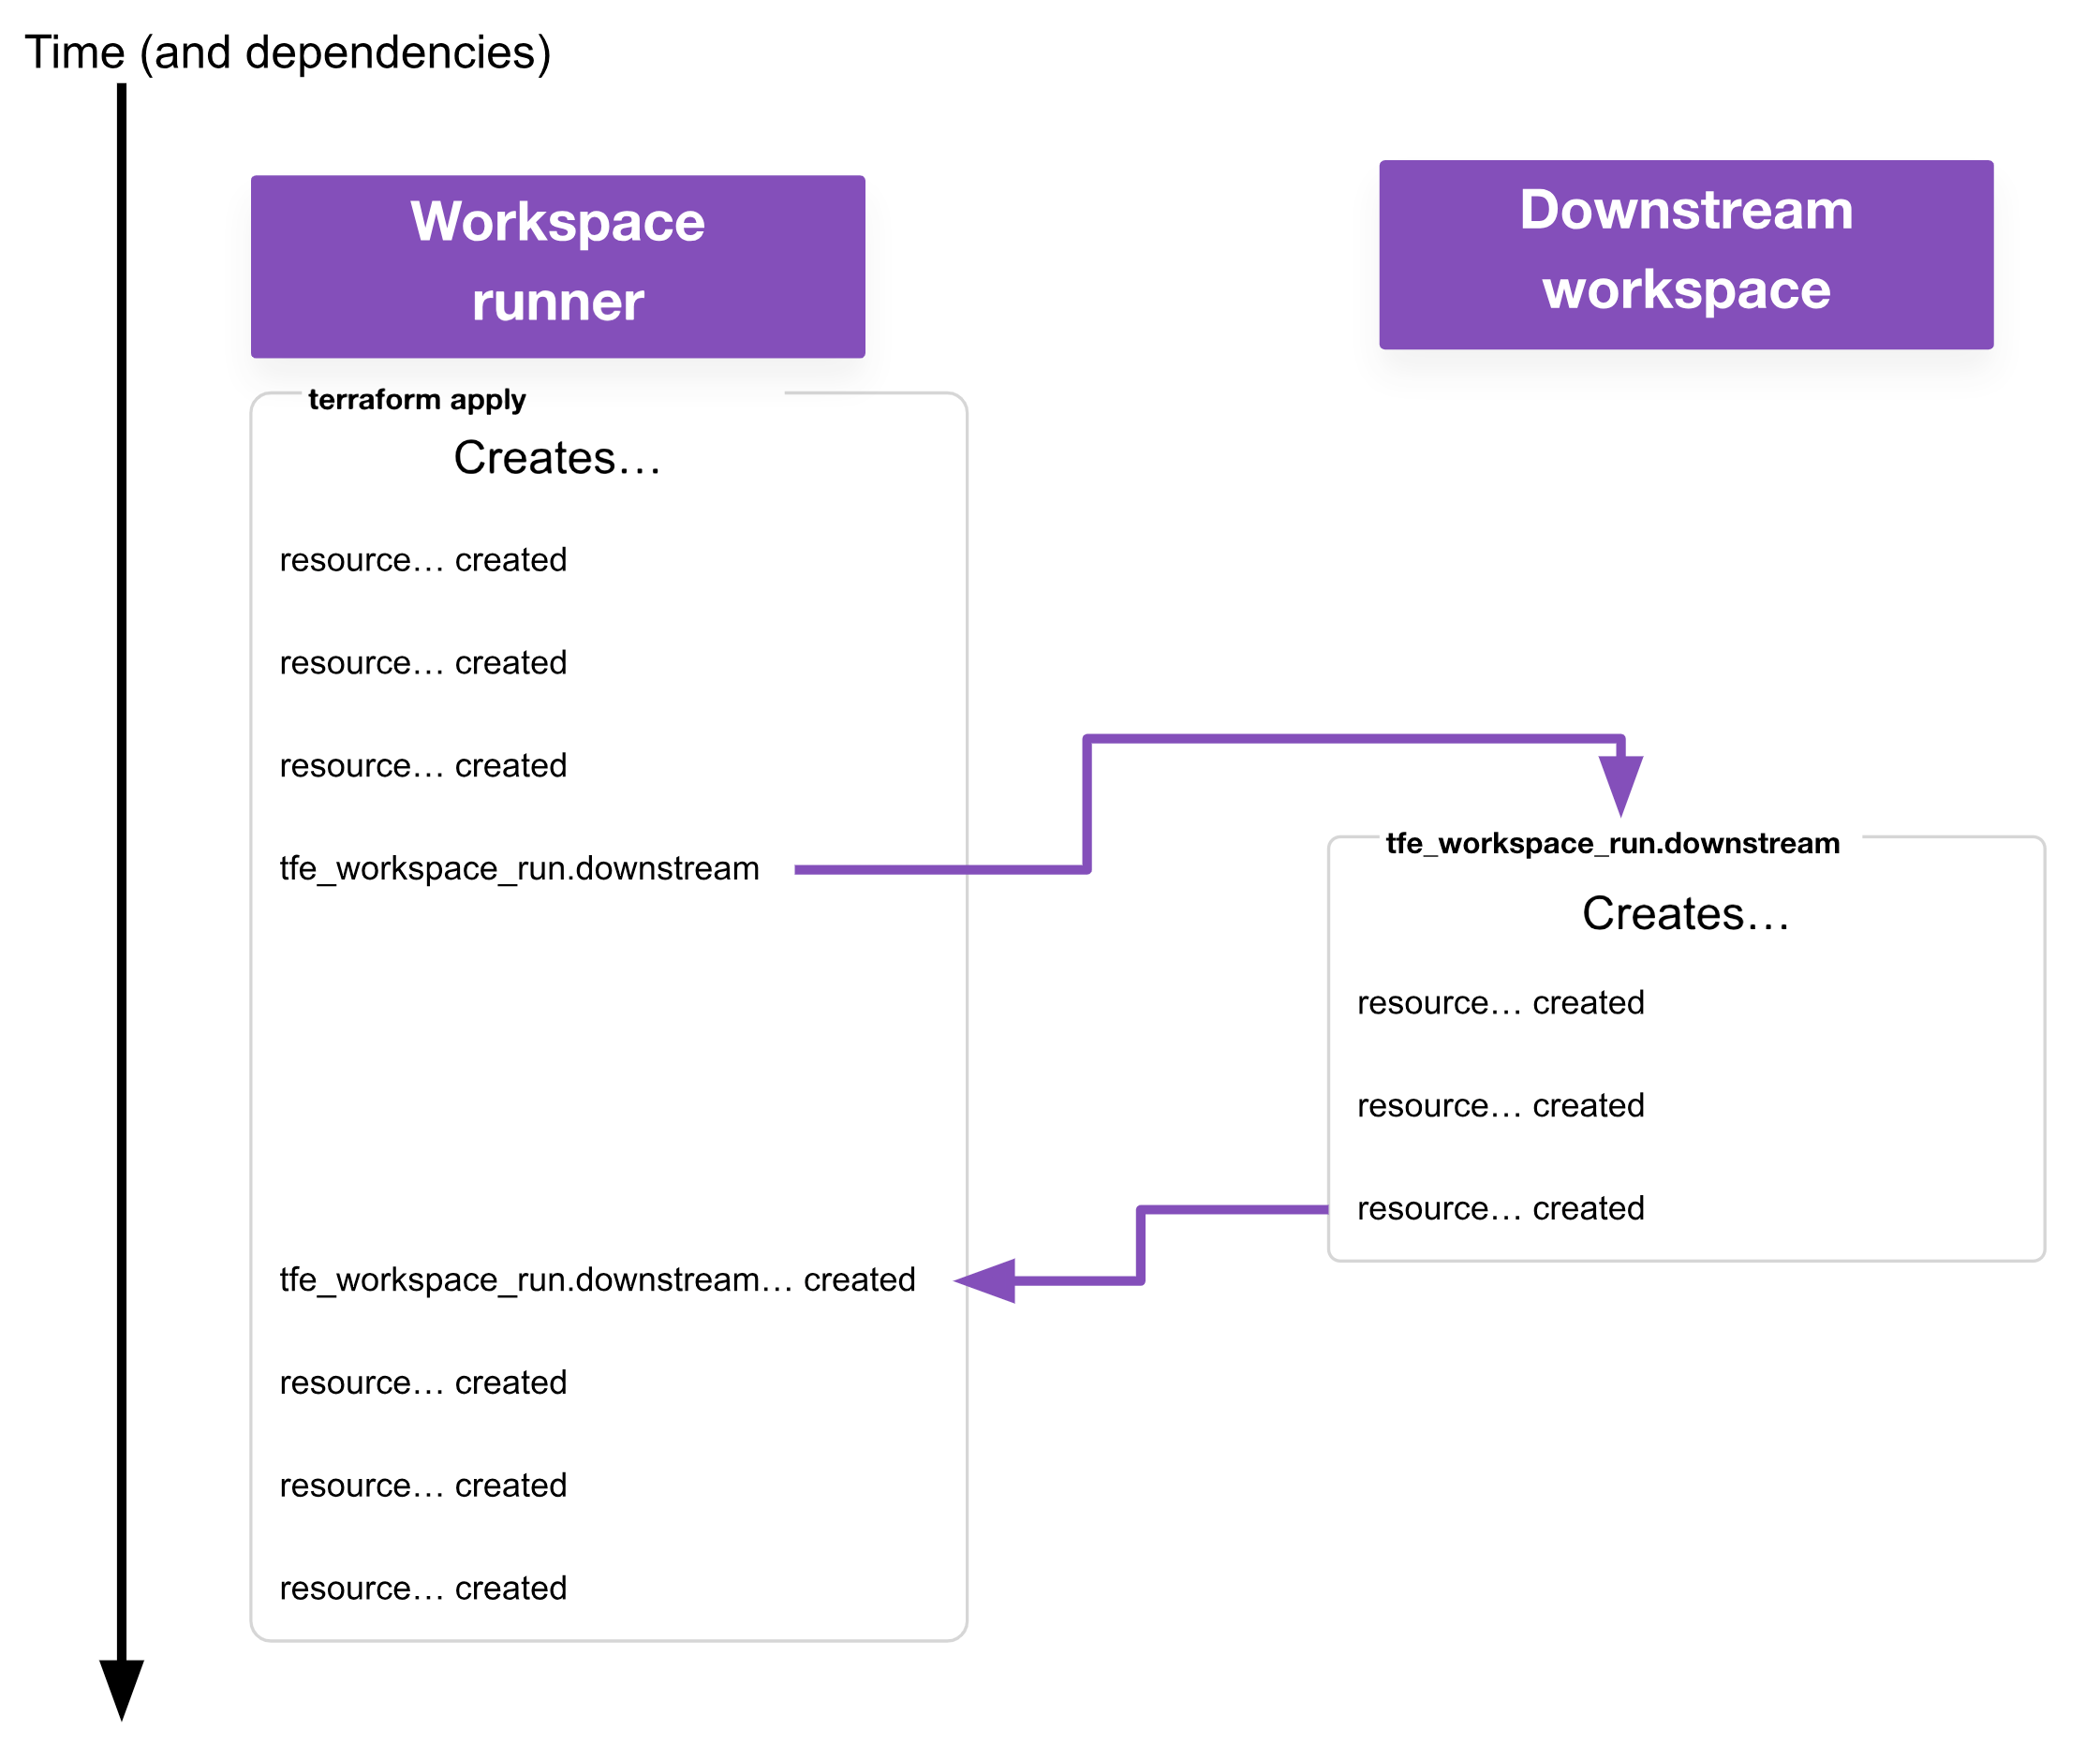
Wait: The resource queues a run on the downstream workspace and waits for it to successfully apply. After a successful plan, the resource can wait for a human approval on the apply or initiate the apply itself. Optionally, the resource can retry if the apply fails.
Destroys
Run triggers do one thing: they trigger apply runs on downstream workspaces, and they do it only after the upstream has completed successfully. They do not handle destruction use cases. For example, you should destroy your compute before destroying your virtual network, and run triggers do not give you a means to model that side of the dependency.
This is where the real power of tfe_workspace_run comes in. The resource allows you to kick off a destroy on a downstream workspace and, if you’re using depends_on, you can ensure that nothing in the upstream workspace is destroyed until the downstream workspace has successfully finished its destroy.
Apply-only and destroy-only
While you can configure both the apply and destroy behavior for the downstream workspace, you don’t need to use both. There are cases where you only want to apply a downstream workspace. There are also times where you only want to destroy a downstream workspace, but you will trigger an apply yourself.
tfe_workspace_run in action
The tfe_workspace_run resource documentation on the Terraform Registry includes a few example code snippets to use as a starting point. At its most basic, the resource looks like this:
resource "tfe_workspace_run" "ws_run_parent" {
  workspace_id = "ws-fSX576JZGENVaeMi"

  apply {
    # tfe_workspace_run is responsible for approving the apply
    # part of the run
    # this is the only required argument in the apply{} and
    # destroy{} blocks
    manual_confirm    = false

    # if the run fails, try again, up to 3 times, waiting between
    # 1 and 30 seconds
    # this is the default behaviour, presented here for clarity
    wait_for_run      = true
    retry_attempts    = 3
    retry_backoff_min = 1
    retry_backoff_max = 30
  }

  destroy {
    manual_confirm    = false
  }
}
This example shows what’s meant by a workspace runner. For the specified workspace, our tfe_workspace_run resource will trigger an apply, wait for that to complete, then consider the tfe_workspace_run successfully created. On destroy, the tfe_workspace_run will trigger a destroy, wait for that to complete, then consider the tfe_workspace_run successfully destroyed.
Because we are using the TFE provider, the workspace runner requires a TFE_TOKEN with sufficient permissions to kick off plan/apply/destroy runs on child workspaces. (You may wish to use the Terraform Cloud secrets engine in HashiCorp Vault to generate these, but that is out-of-scope for this blog post.)
Beyond the basic examples, this post will present a few patterns with example configuration for how to use this resource.
Apply (fire and forget) and destroy (wait)
The tfe_workspace_run resource is most useful when creating new workspaces. This example uses the TFE provider to create a workspace, set up all the necessary permissions, and configure the dynamic credentials. All of that must be done before the workspace can be applied.
As a reminder, the term “workspace creator” refers to any workspace responsible for creating other workspaces and related resources. In most cases when using a workspace creator, it will also be a workspace runner for the workspaces it creates (i.e. it is responsible for triggering apply and/or destroy runs on those workspaces).
resource "tfe_workspace_run" "downstream" {
  workspace_id = tfe_workspace.downstream.id

  # depends_on = creds and other workspace dependencies go here

  apply {
    # Fire and Forget
    wait_for_run = false
    # auto-apply
    manual_confirm = false
  }

  destroy {
    # Wait for destroy before doing anything else
    wait_for_run = true
    # auto-apply
    manual_confirm = false
  }
}
From the perspective of the workspace runner, it doesn’t need to care if the downstream workspace was successfully applied, just that an apply was attempted. This functionality alone is achievable with run triggers (and in this fire-and-forget mode, the behavior is very similar), but as this example is already using tfe_workspace_run to handle the destroy, it makes sense to use it for the apply as well.
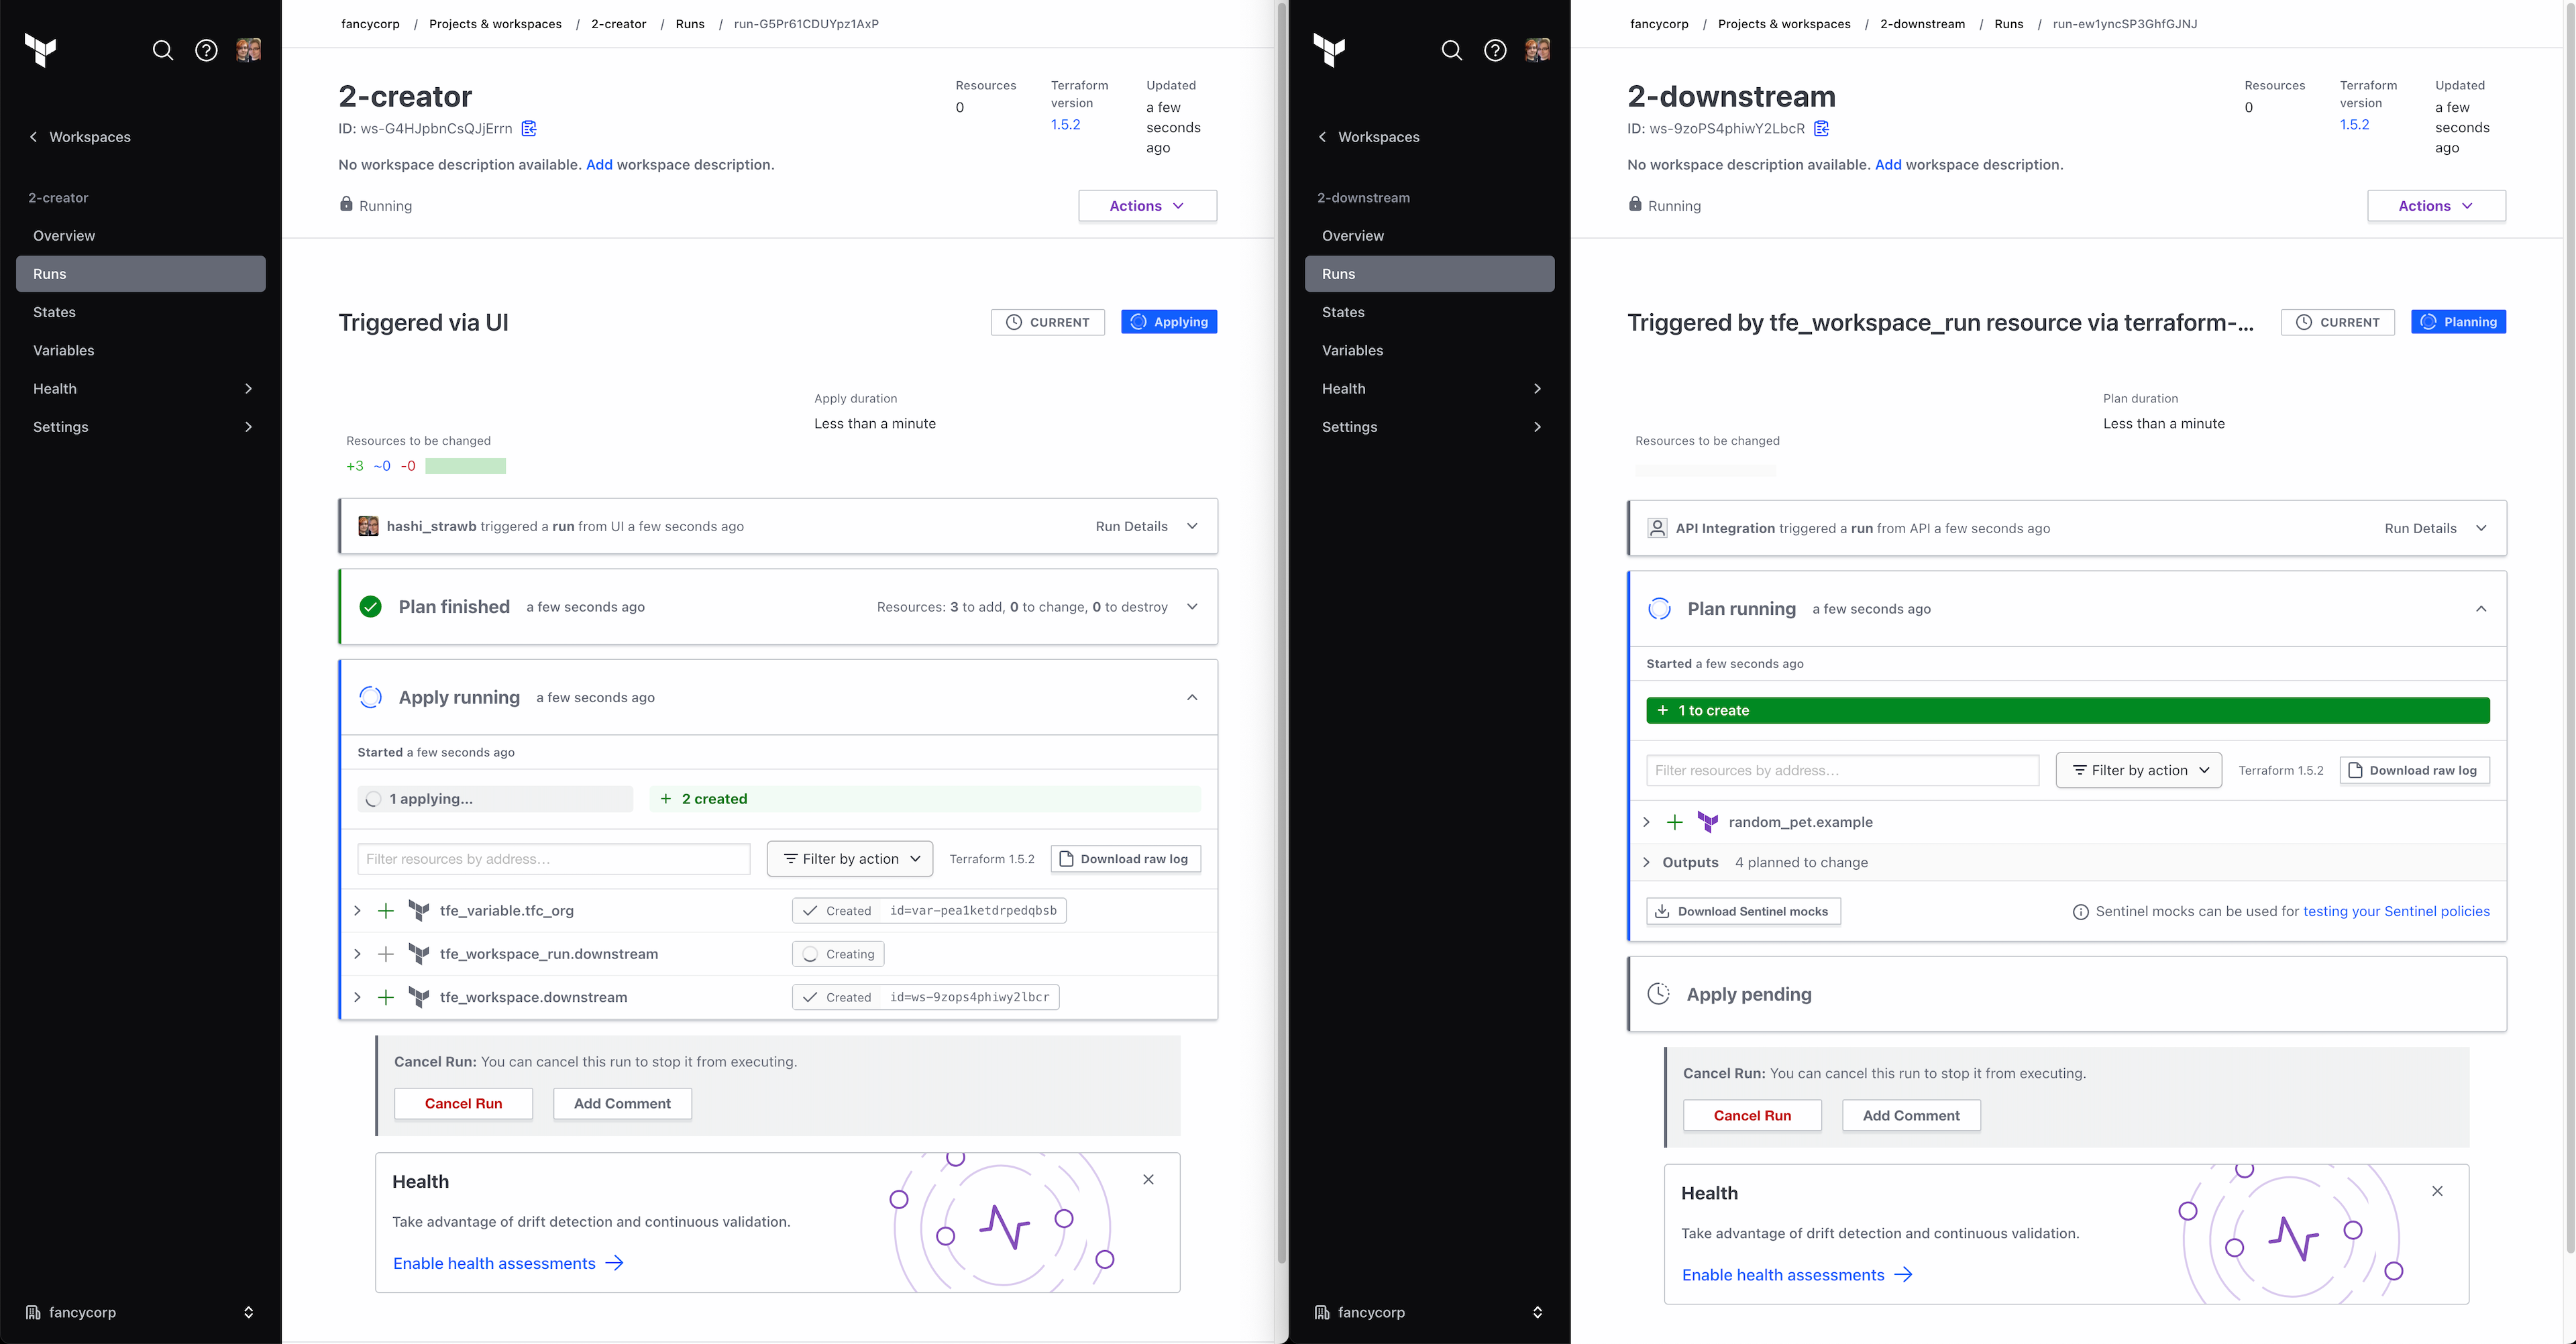
By including the destroy{} block in combination with depends_on, you can ensure that the workspace and supporting resources remain untouched until the downstream workspace has successfully destroyed all the resources it manages.
If you do not include a destroy{} block, then attempting to delete the downstream workspace will result in an error like this:
Error: error deleting workspace ws-BxxKPnyBVpxwVQB1: This
workspace has 4 resources under management and must be force
deleted by setting force_delete = true
If you do not include the depends_on, then dependencies such as variables and credentials that the downstream workspace needs will end up getting deleted too early.
The upcoming ephemeral workspaces will ensure the entire stack of workspaces is safely destroyed in the correct order once the ephemeral workspace hits its time-to-live (TTL).
Destroy-only workflows
This is a pattern I use extensively in my workspace creator. As a reminder, this is a “workspace runner” (i.e. a workspace which triggers runs on other workspaces). In my case, when creating a new workspace, I don’t necessarily want it to try to apply immediately, so my configuration looks like this:
resource "tfe_workspace_run" "downstream" {
  workspace_id = tfe_workspace.downstream.id

  # depends_on = creds and other workspace dependencies go here

  destroy {
    wait_for_run = true
    manual_confirm = false
  }
}
The only difference between this and the previous example is the absence of the apply{} block. This means that when doing an apply on the workspace runner, Terraform will create a placeholder resource referencing a non-existent apply on the downstream workspace. This may seem pointless as nothing has actually been done yet, but the presence of this resource in Terraform state signals to Terraform that, when it comes time to destroy the workspace runner, it should first kick off a destroy on the downstream workspace.
Similarly, you can also have an apply-only workflow by including an apply{} block but no destroy{}. For most use cases, an apply{} block with no destroy{} block is practically identical to just using run triggers. If it is, then just use run triggers. But for some niche use-cases, you may want to conditionally apply, which run triggers does not allow you to do.
What if there are more than two workspaces?
This is the main reason for the concept of a workspace runner separate from the idea of an upstream workspace. The previous examples have a single upstream workspace for every downstream workspace. In cases like that, introducing an additional workspace runner just adds unnecessary complexity; the upstream can handle the runner functionality.
Workspace runners become useful in cases where there are more than two workspaces. While upstream workspaces can handle the runner role functionally, if you have apply or destroy runs configured to wait for completion, then you’ll have more workspaces in your stack, which results in more concurrent runs. If you have too many, the queue will fill up, and you’ll end up in a deadlock, where downstream workspaces are queued but can never begin, and upstream workspaces are waiting on those downstream workspace runs.
By introducing a separate workspace runner, you can ensure you need to consume only two concurrency slots: one for the runner, and one for whichever other workspace it is currently running.
Some examples, first a simple one, then a complex one:

resource "tfe_workspace_run" "A" {
  workspace_id = data.tfe_workspace.ws["A"].id

  apply {
    wait_for_run   = true
    manual_confirm = false
  }

  destroy {
    wait_for_run   = true
    manual_confirm = false
  }
}

resource "tfe_workspace_run" "B" {
  workspace_id = data.tfe_workspace.ws["B"].id

  depends_on = [tfe_workspace_run.A]

  apply {
    wait_for_run   = true
    manual_confirm = false
  }

  destroy {
    wait_for_run   = true
    manual_confirm = false
  }
}

resource "tfe_workspace_run" "C" {
  workspace_id = data.tfe_workspace.ws["C"].id

  depends_on = [tfe_workspace_run.B]

  apply {
    wait_for_run   = true
    manual_confirm = false
  }

  destroy {
    wait_for_run   = true
    manual_confirm = false
  }
}
- In this example, to apply, the workspace runner queues a run on A, waits for it to complete, queues a run on B, waits for it to complete, then queues a run on C.
- If you care only about the apply phase, this is a perfect use case for run triggers.
- To destroy, the workspace runner queues a run on C first, then B, then A.
Of course, there’s no reason you’re limited to each workspace having one upstream or one downstream. You may have a complex web of dependencies between your workspaces. Here’s as example (with the code in the repo linked at the end of the post):
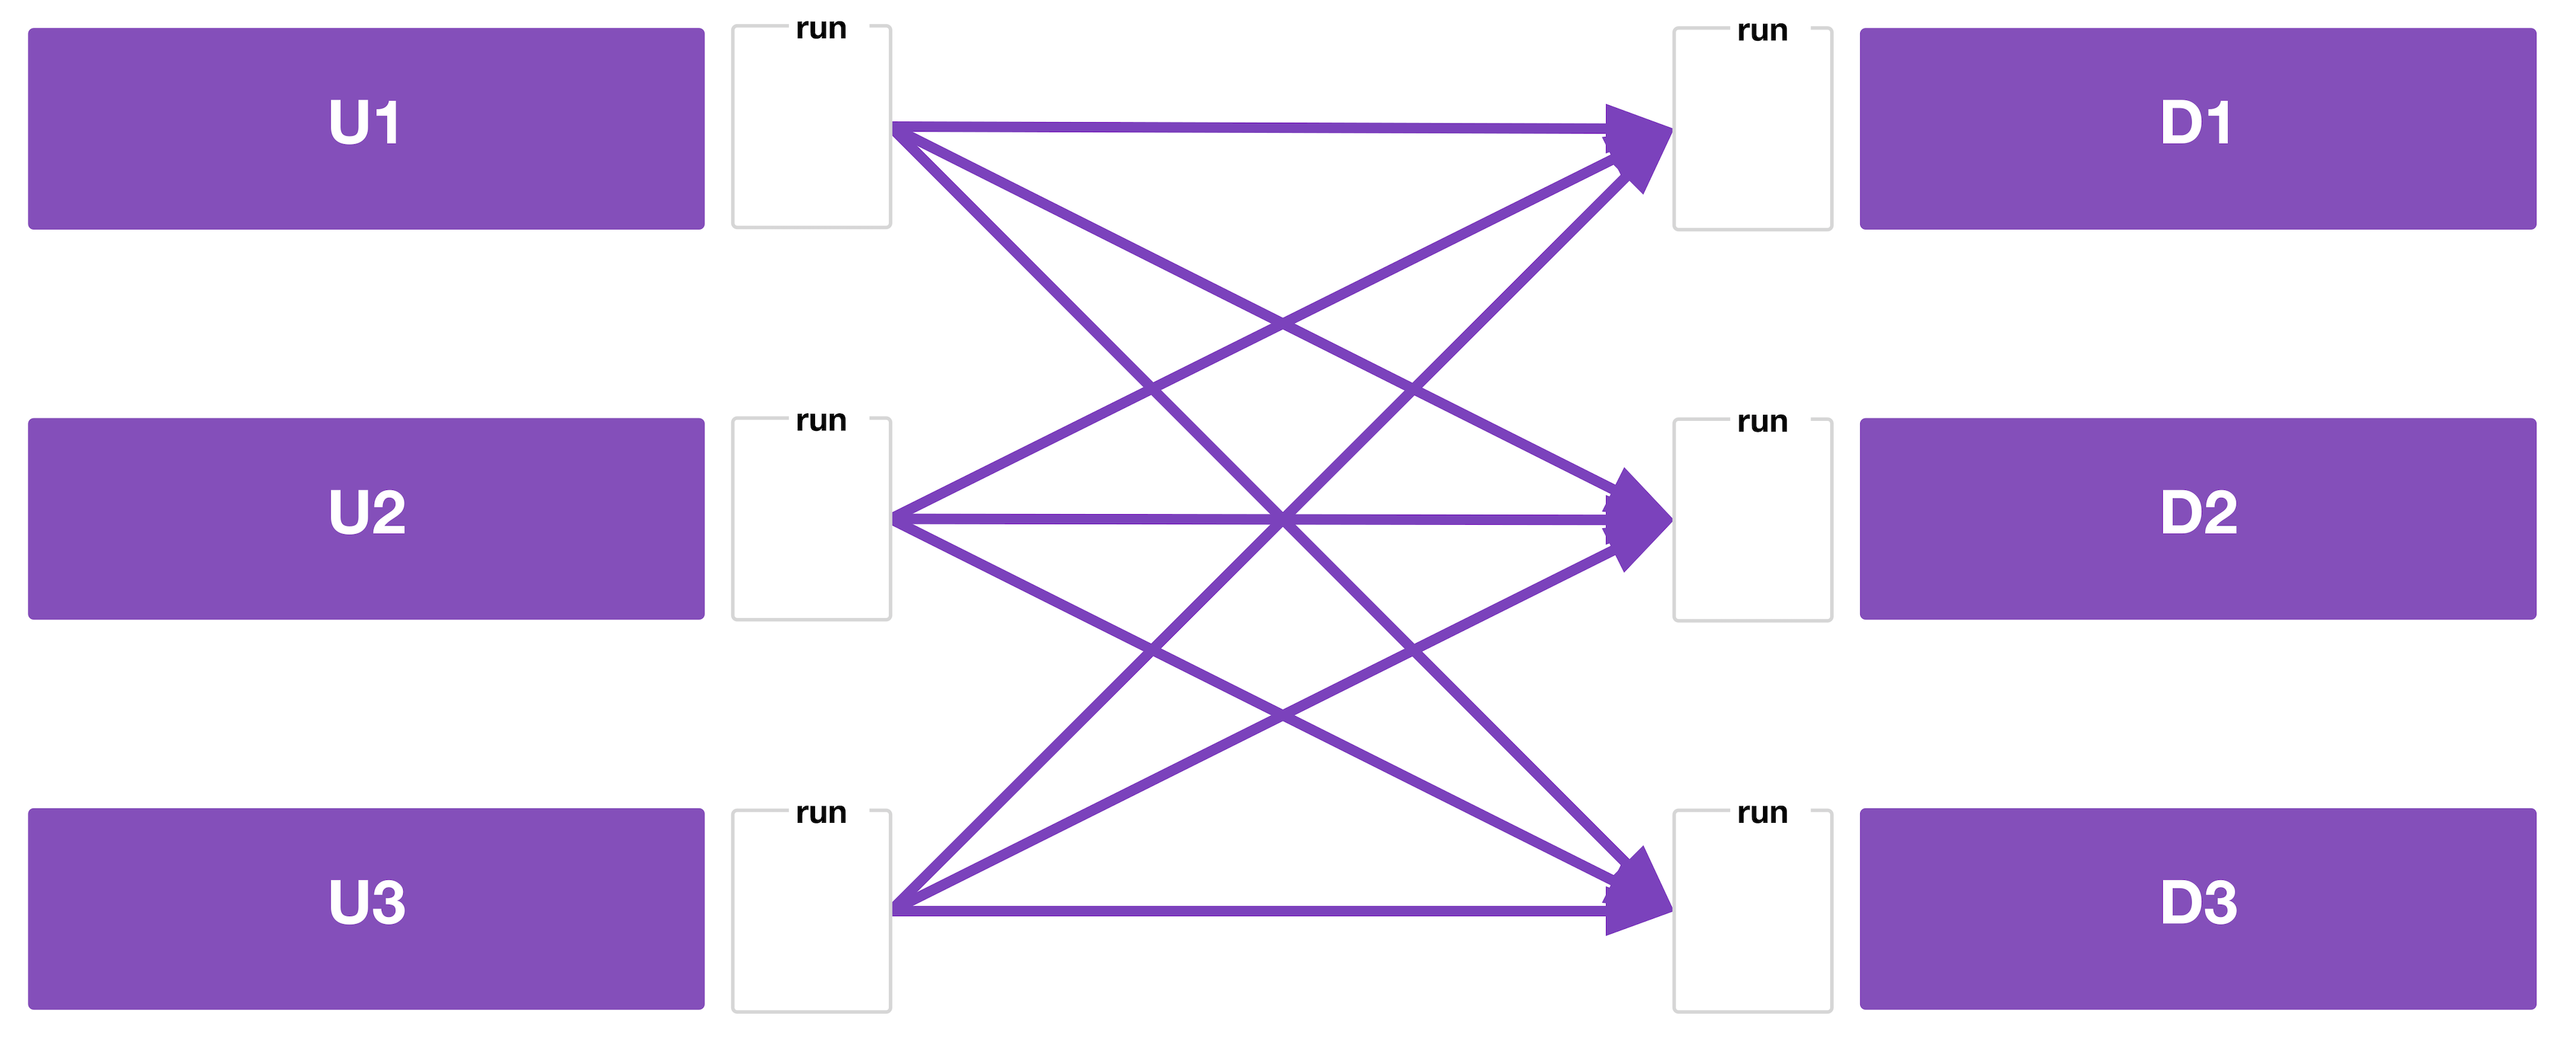
- Whether or not there’s an actual real-world use case for this precise graph of workspace dependencies, it serves as a good example of the complexity you can end up with.
- In this example, the workspace runner queues runs on U1, U2, and U3.
- If there are spare concurrency slots, all three will run concurrently. If not, at least one will wait in the queue.
- Once all three have finished, then the workspace runner queues runs on D1, D2, and D3.
- Again, if you just care about the apply phase, run triggers would work, but you would get a lot of failed plans because U1, U2, and U3 finish at different times.
- To destroy, the workspace runner queues a run on D1, D2, and D3 first, then U1, U2, and U3.
Summary
The resource required to power this workflow is now an official, supported part of the TFE provider. As more people make use of tfe_workspace_run and give feedback, HashiCorp can continue to improve the resource.
If you aren’t already using Terraform Cloud, you’ll want to experiment with that first. Start for free by signing up for an account.
Please note that to avoid hitting concurrency limits on the Free tier of Terraform Cloud, you can:
- Use only run triggers or
tfe_workspace_runin fire-and-forget mode, or - Ensure the workspace runner is running in local mode if you plan to use
tfe_workspace_runin wait mode, or - Upgrade to a paid subscription to increase your concurrency limits.
If you are an existing Terraform Cloud user, then experiment with these patterns. Regardless of whether you’re using run triggers or tfe_workspace_run, automating the dependencies between workspaces will save you time and effort.
As mentioned at the beginning of the post, you can find these code examples in this GitHub repository.
]]>